Nodes
This article does not cover the installation process for a Remnawave Node. For detailed installation instructions, please refer to the installation documentation.
The Remnawave Node is the component responsible for proxying user traffic through Xray-core within the Remnawave system.
The Remnawave Panel itself does not contain the Xray core. This means that even if you create a user, configure Hosts, Inbounds, and everything else, the user will not be able to connect until you add a Remnawave Node.
Nodes
To do that, navigate to Nodes → Management.
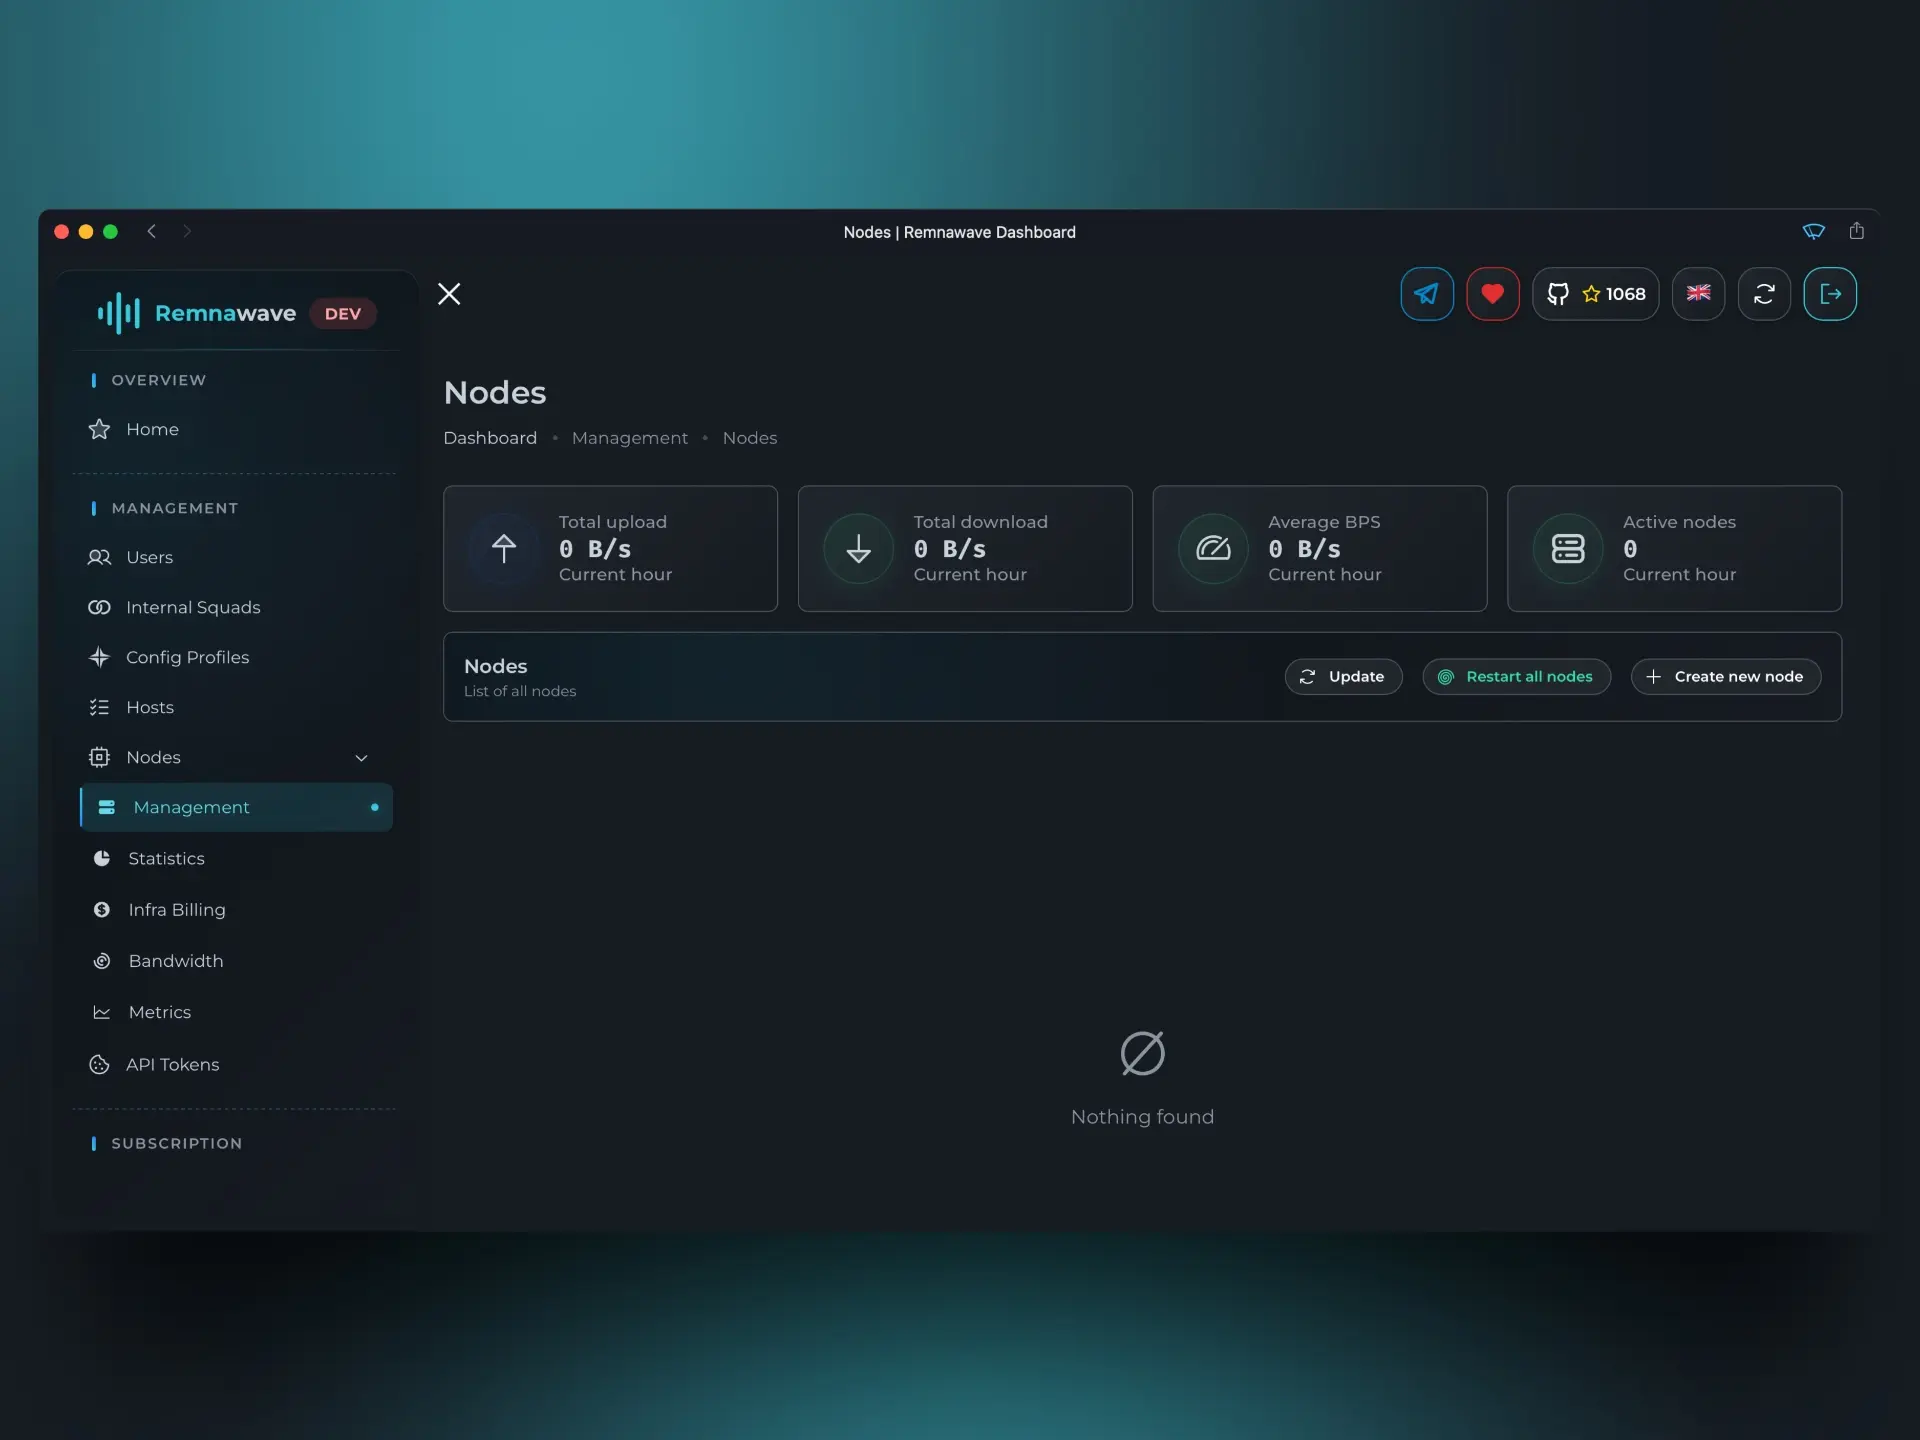
At the top, you'll see a small block of four cards displaying statistics for the current hour (e.g., if it's 4:30 PM, the stats are from 4:00 PM to 4:30 PM).
Below that, you’ll find the Actions block. Here, you can manually Update Node data or perform a bulk action to Restart all nodes.
However, before you can use these options, you’ll need to add at least one node by clicking + Create new node.
Node Vitals
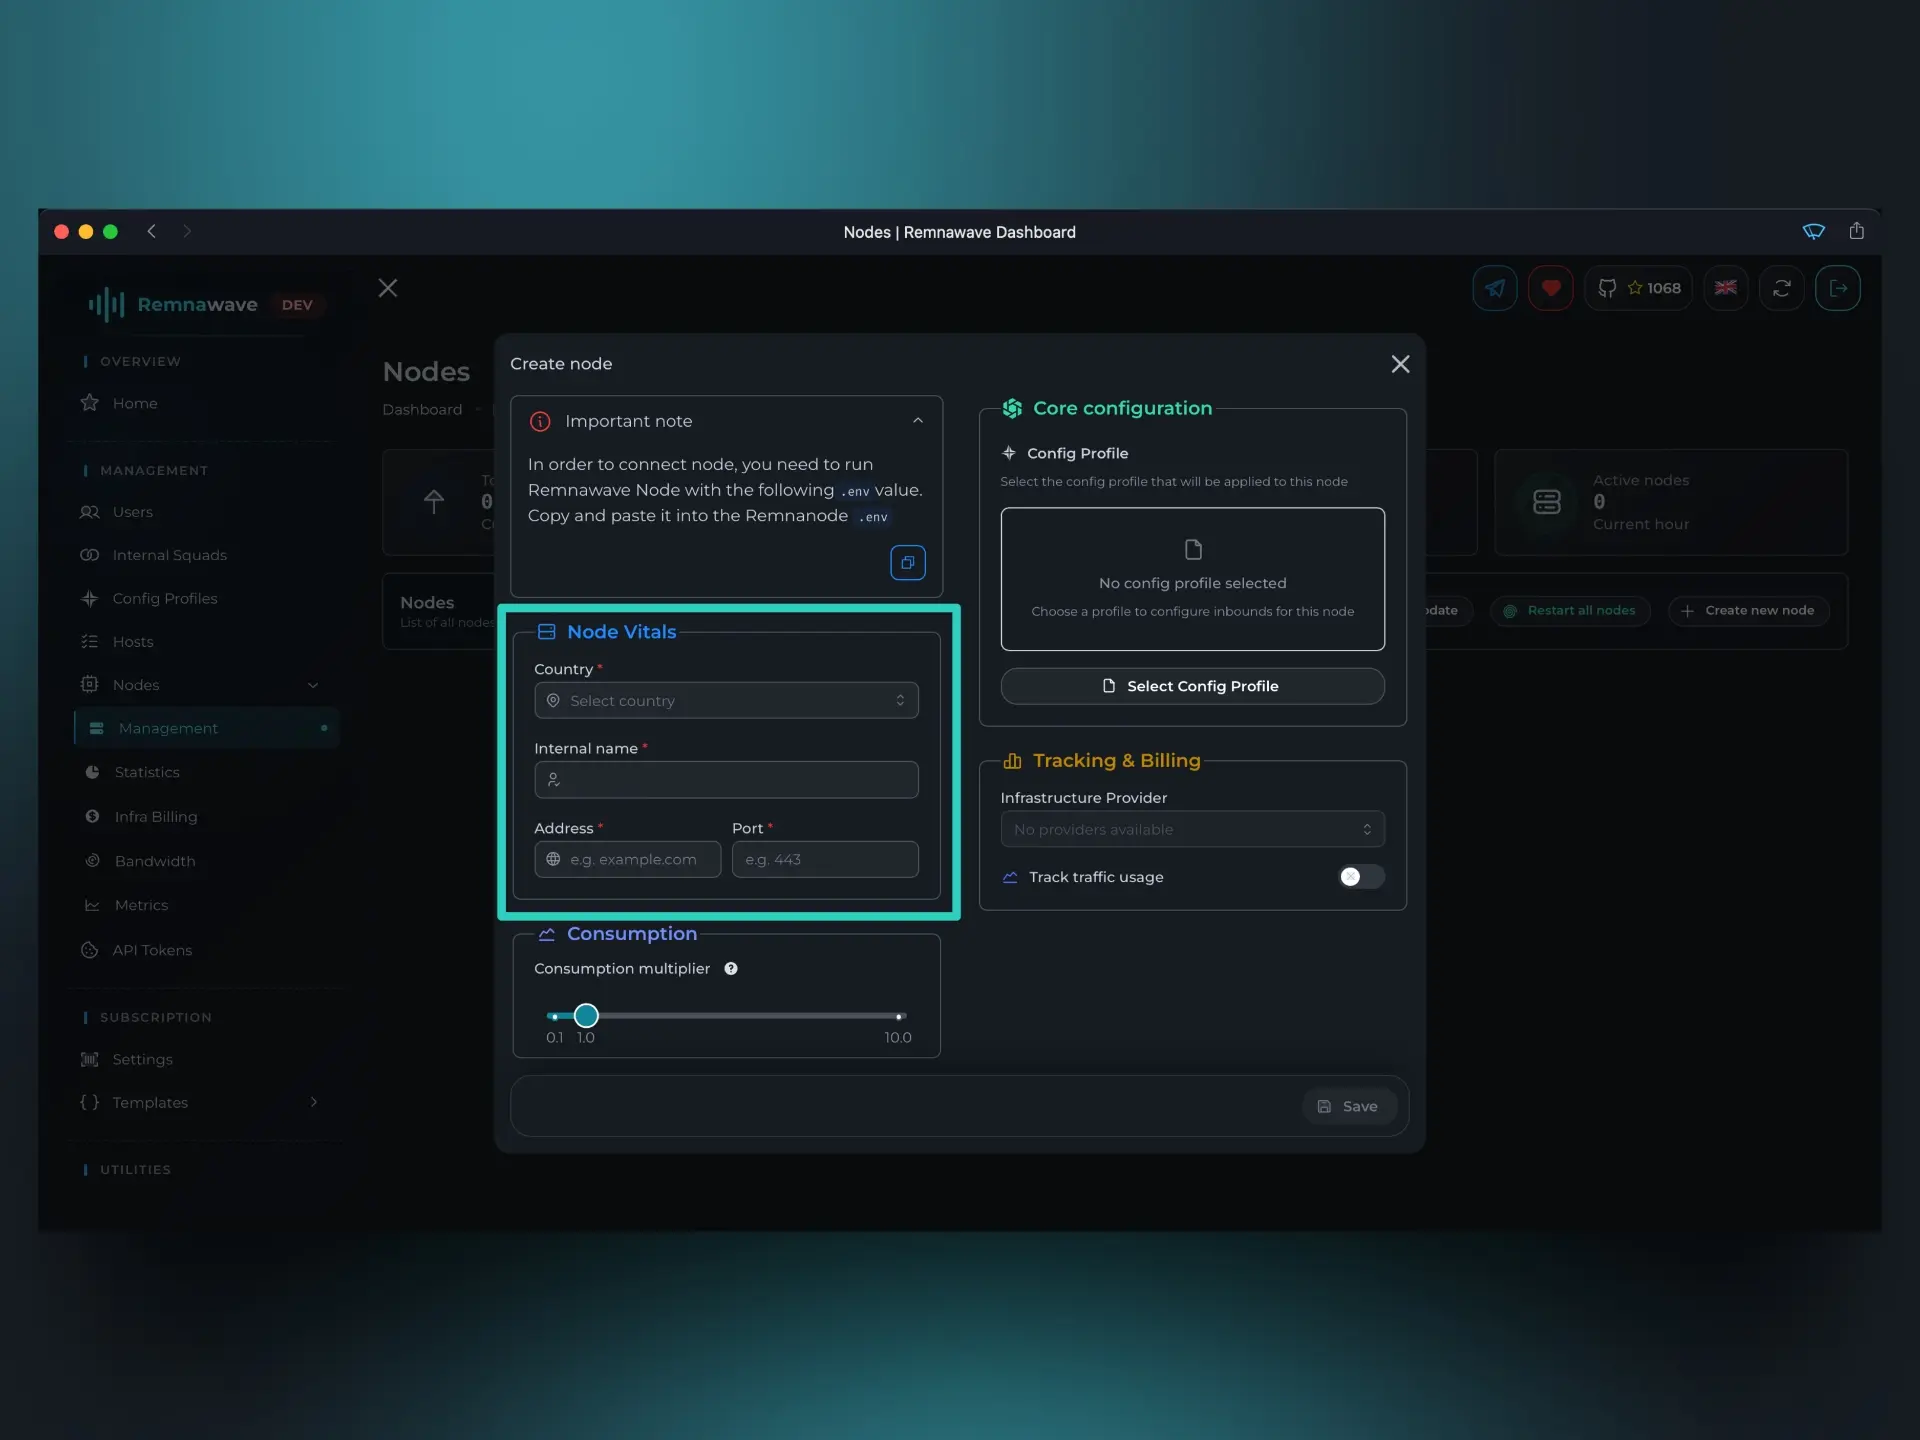
This block contains essential parameters required to create a Node.
- Country – Select the country where the Node is located.
- Internal name – A name used to identify the Node within Remnawave.
- Address – The IP address or domain name of the Node.
- Port – The port your Node is running on.
Consumption
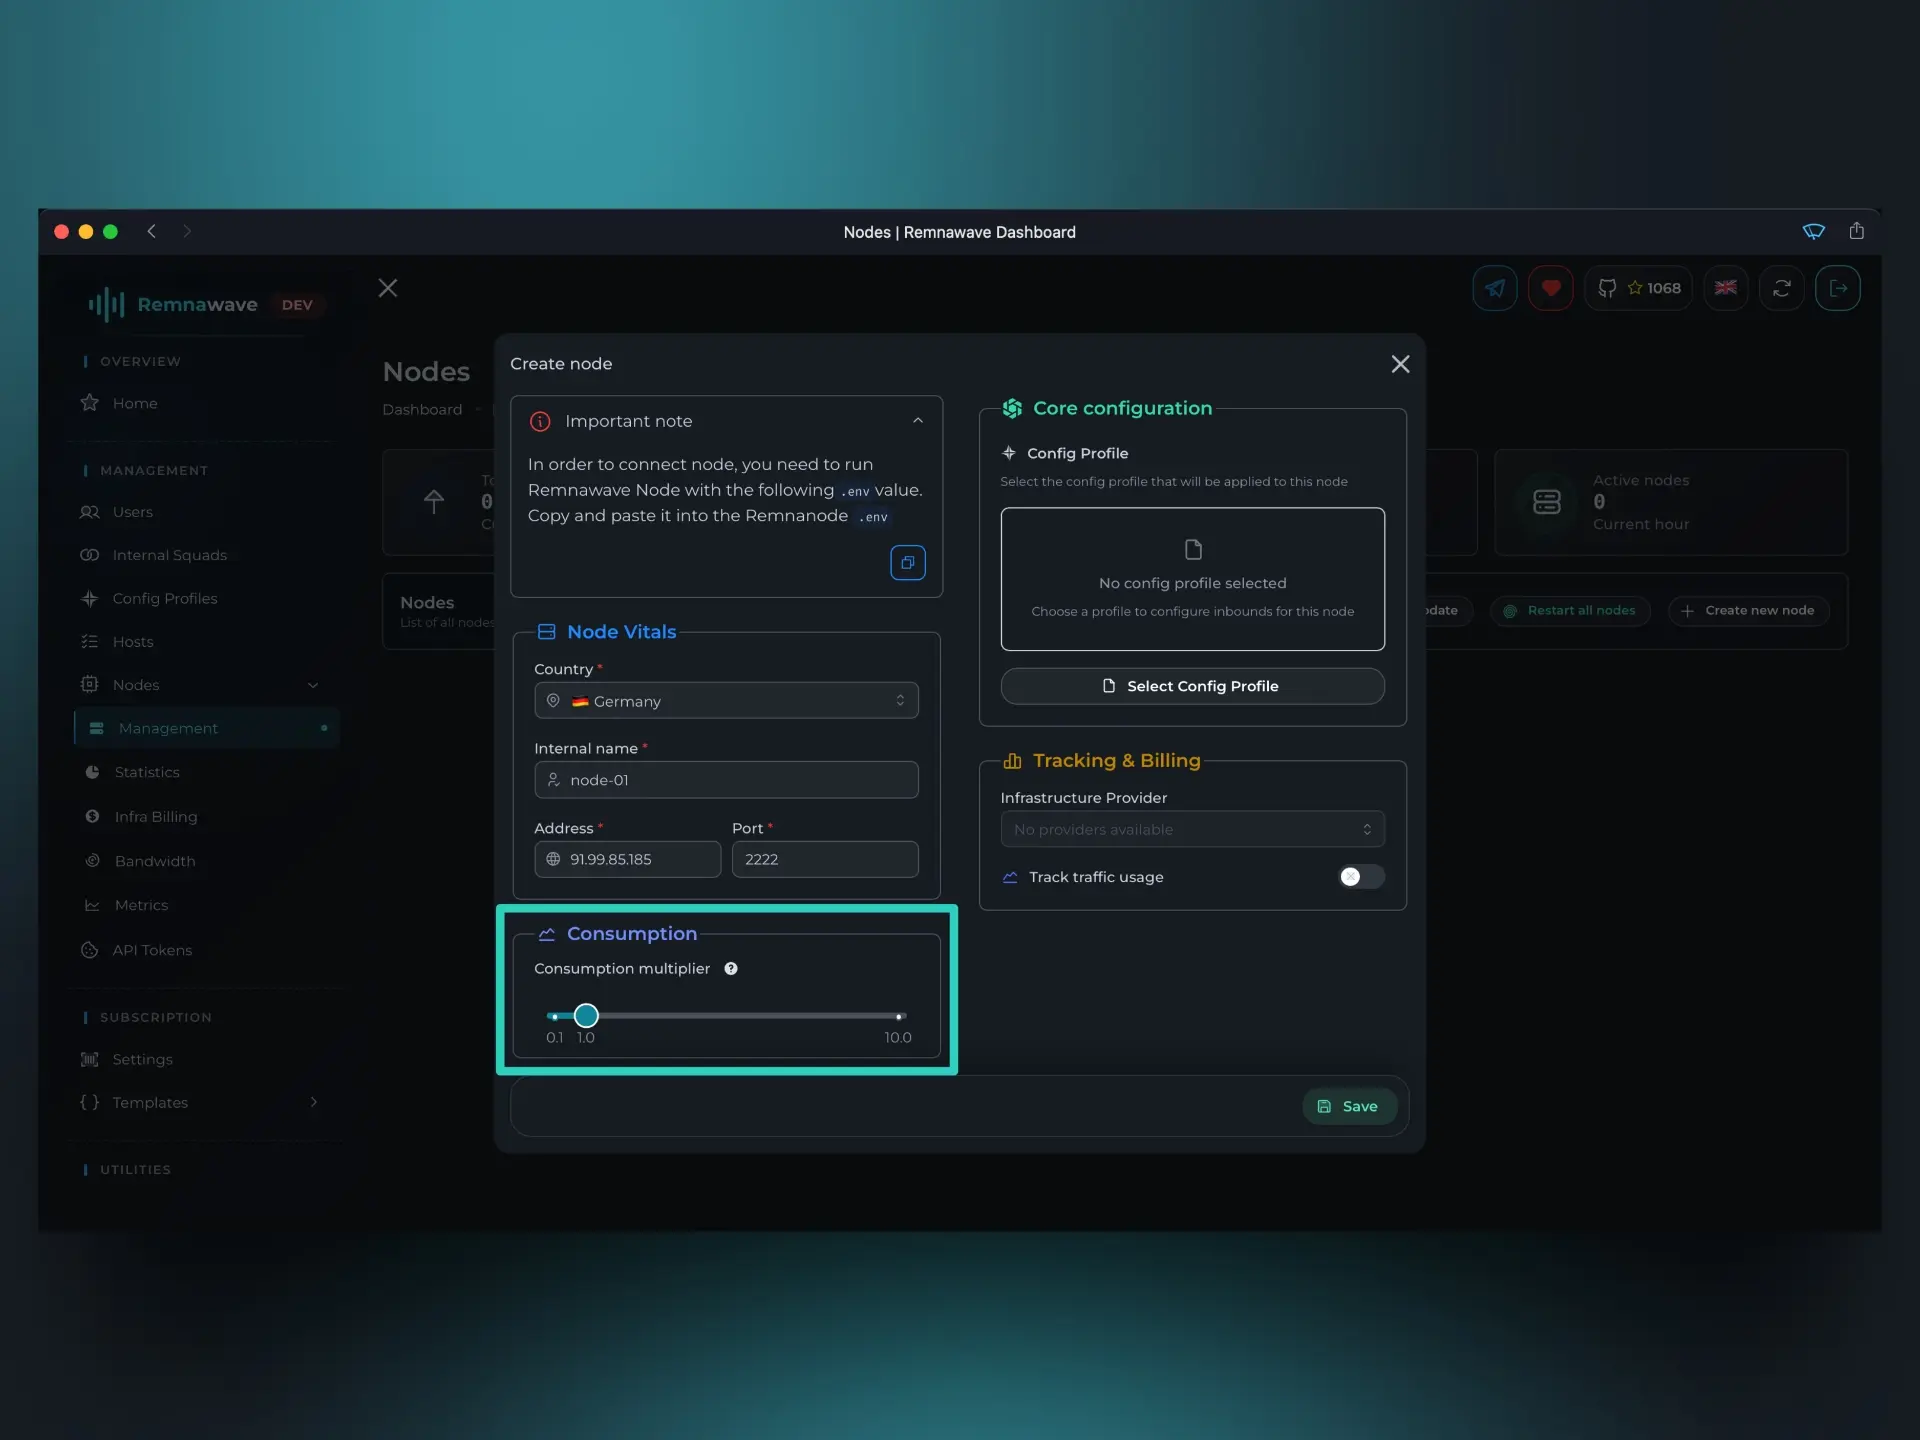
This block lets you configure how user traffic is counted using a multiplier (coefficient):
1.0 means normal usage, 0.5 counts half the actual traffic, and 2.0 doubles it.
For instance, if a user has a 1 GB data limit and the coefficient is set to 2.0, they’ll only be able to use 0.5 GB of actual traffic.
Remnawave will still report 1 GB used, and the user's status will change to LIMITED.
Core Configuration
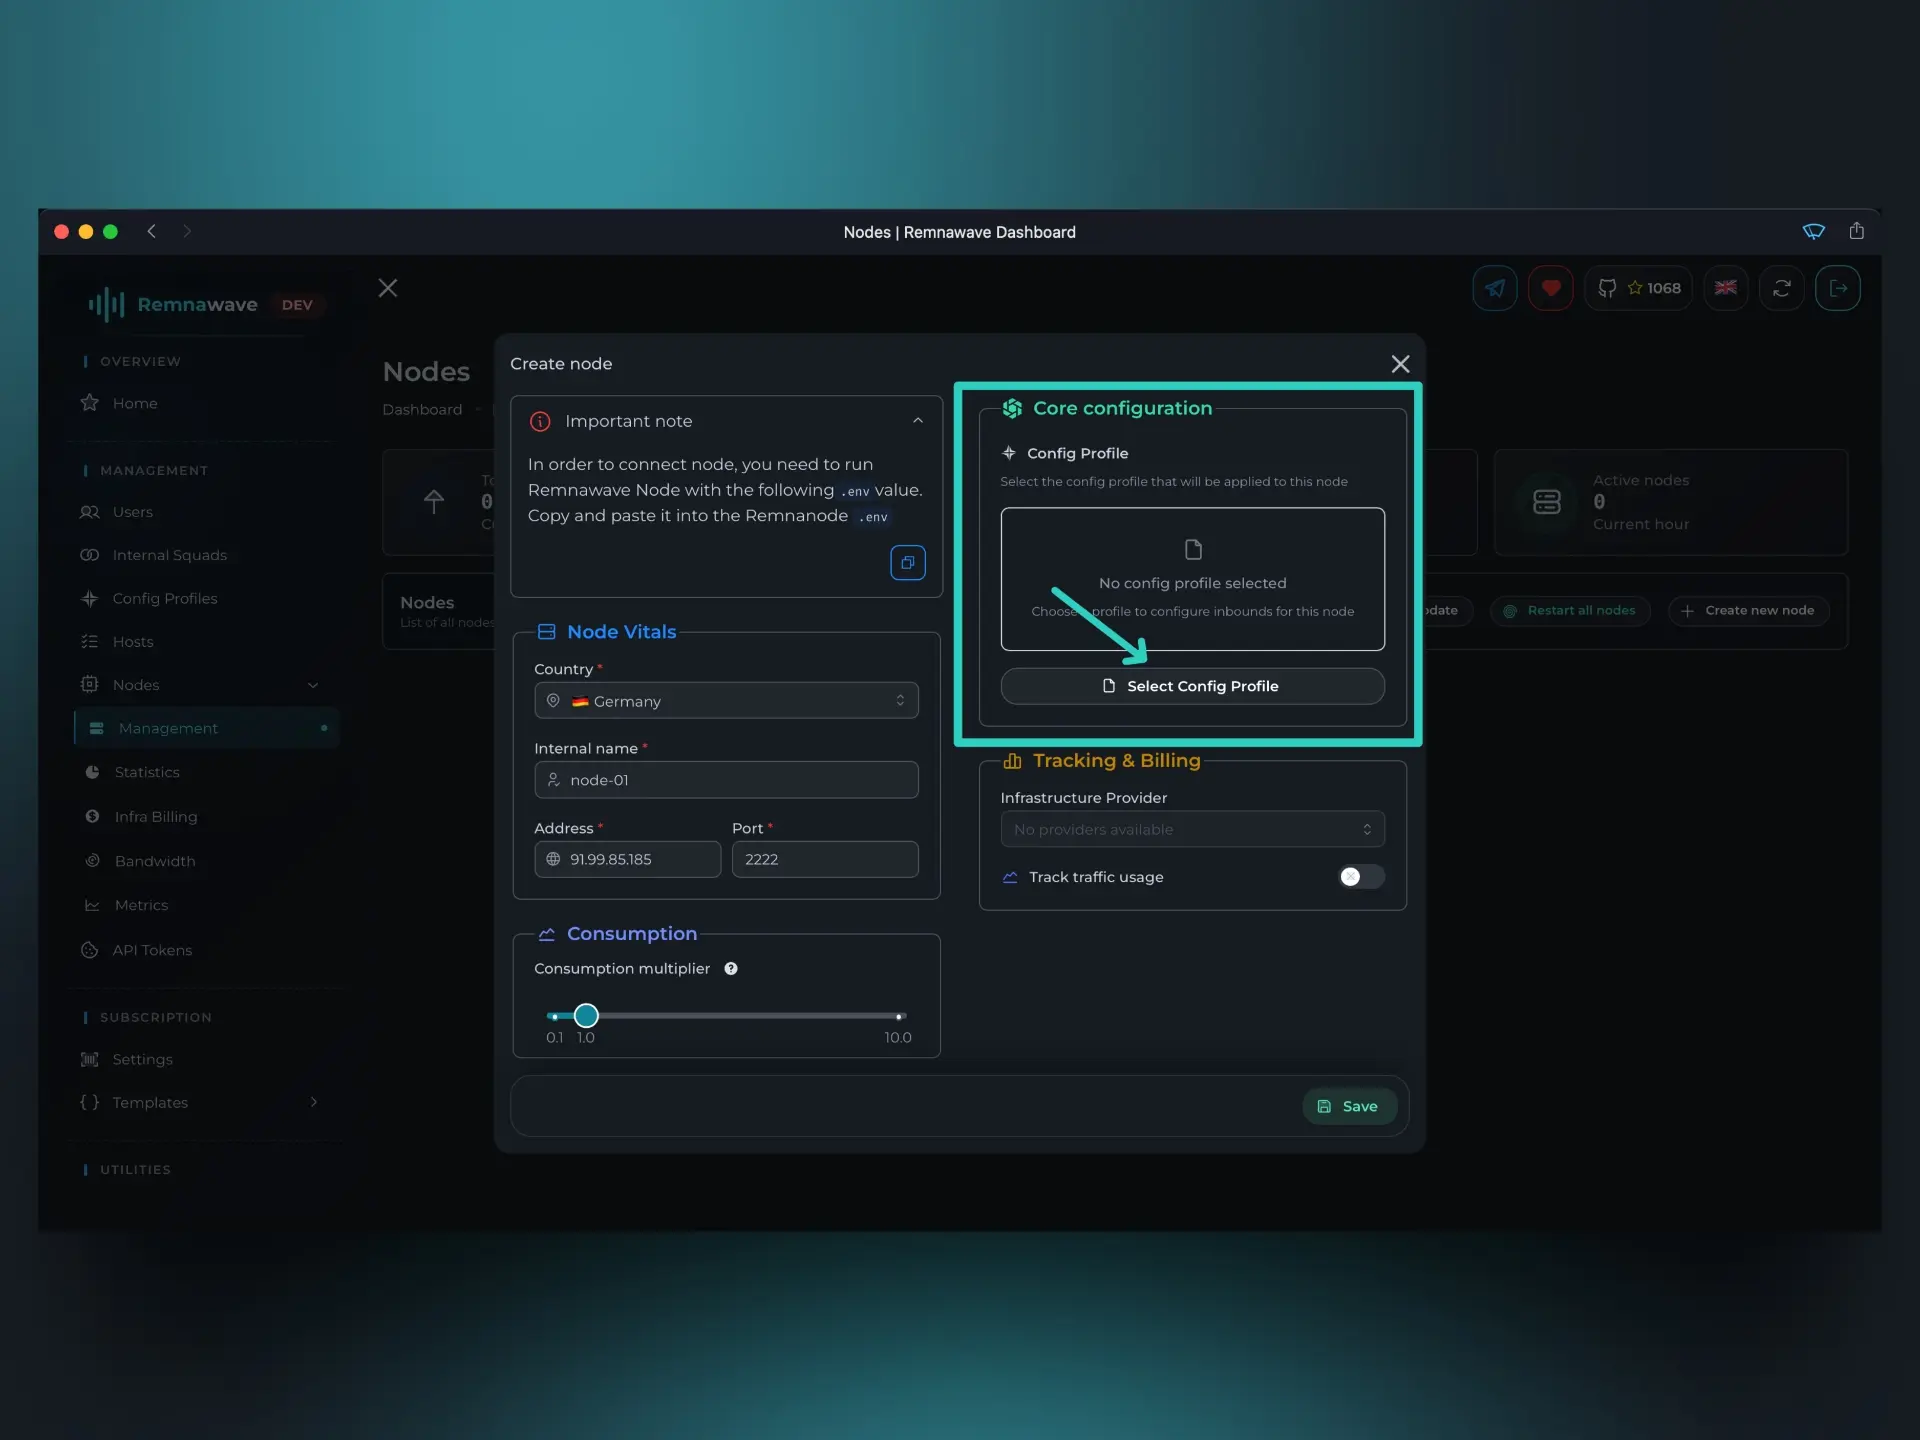
Here, you need to select which Config Profile you want the Node to run on.
Since we've just set up the Panel, we only have one Profile, which was automatically generated.
Click the Select Config Profile button to choose a Profile.
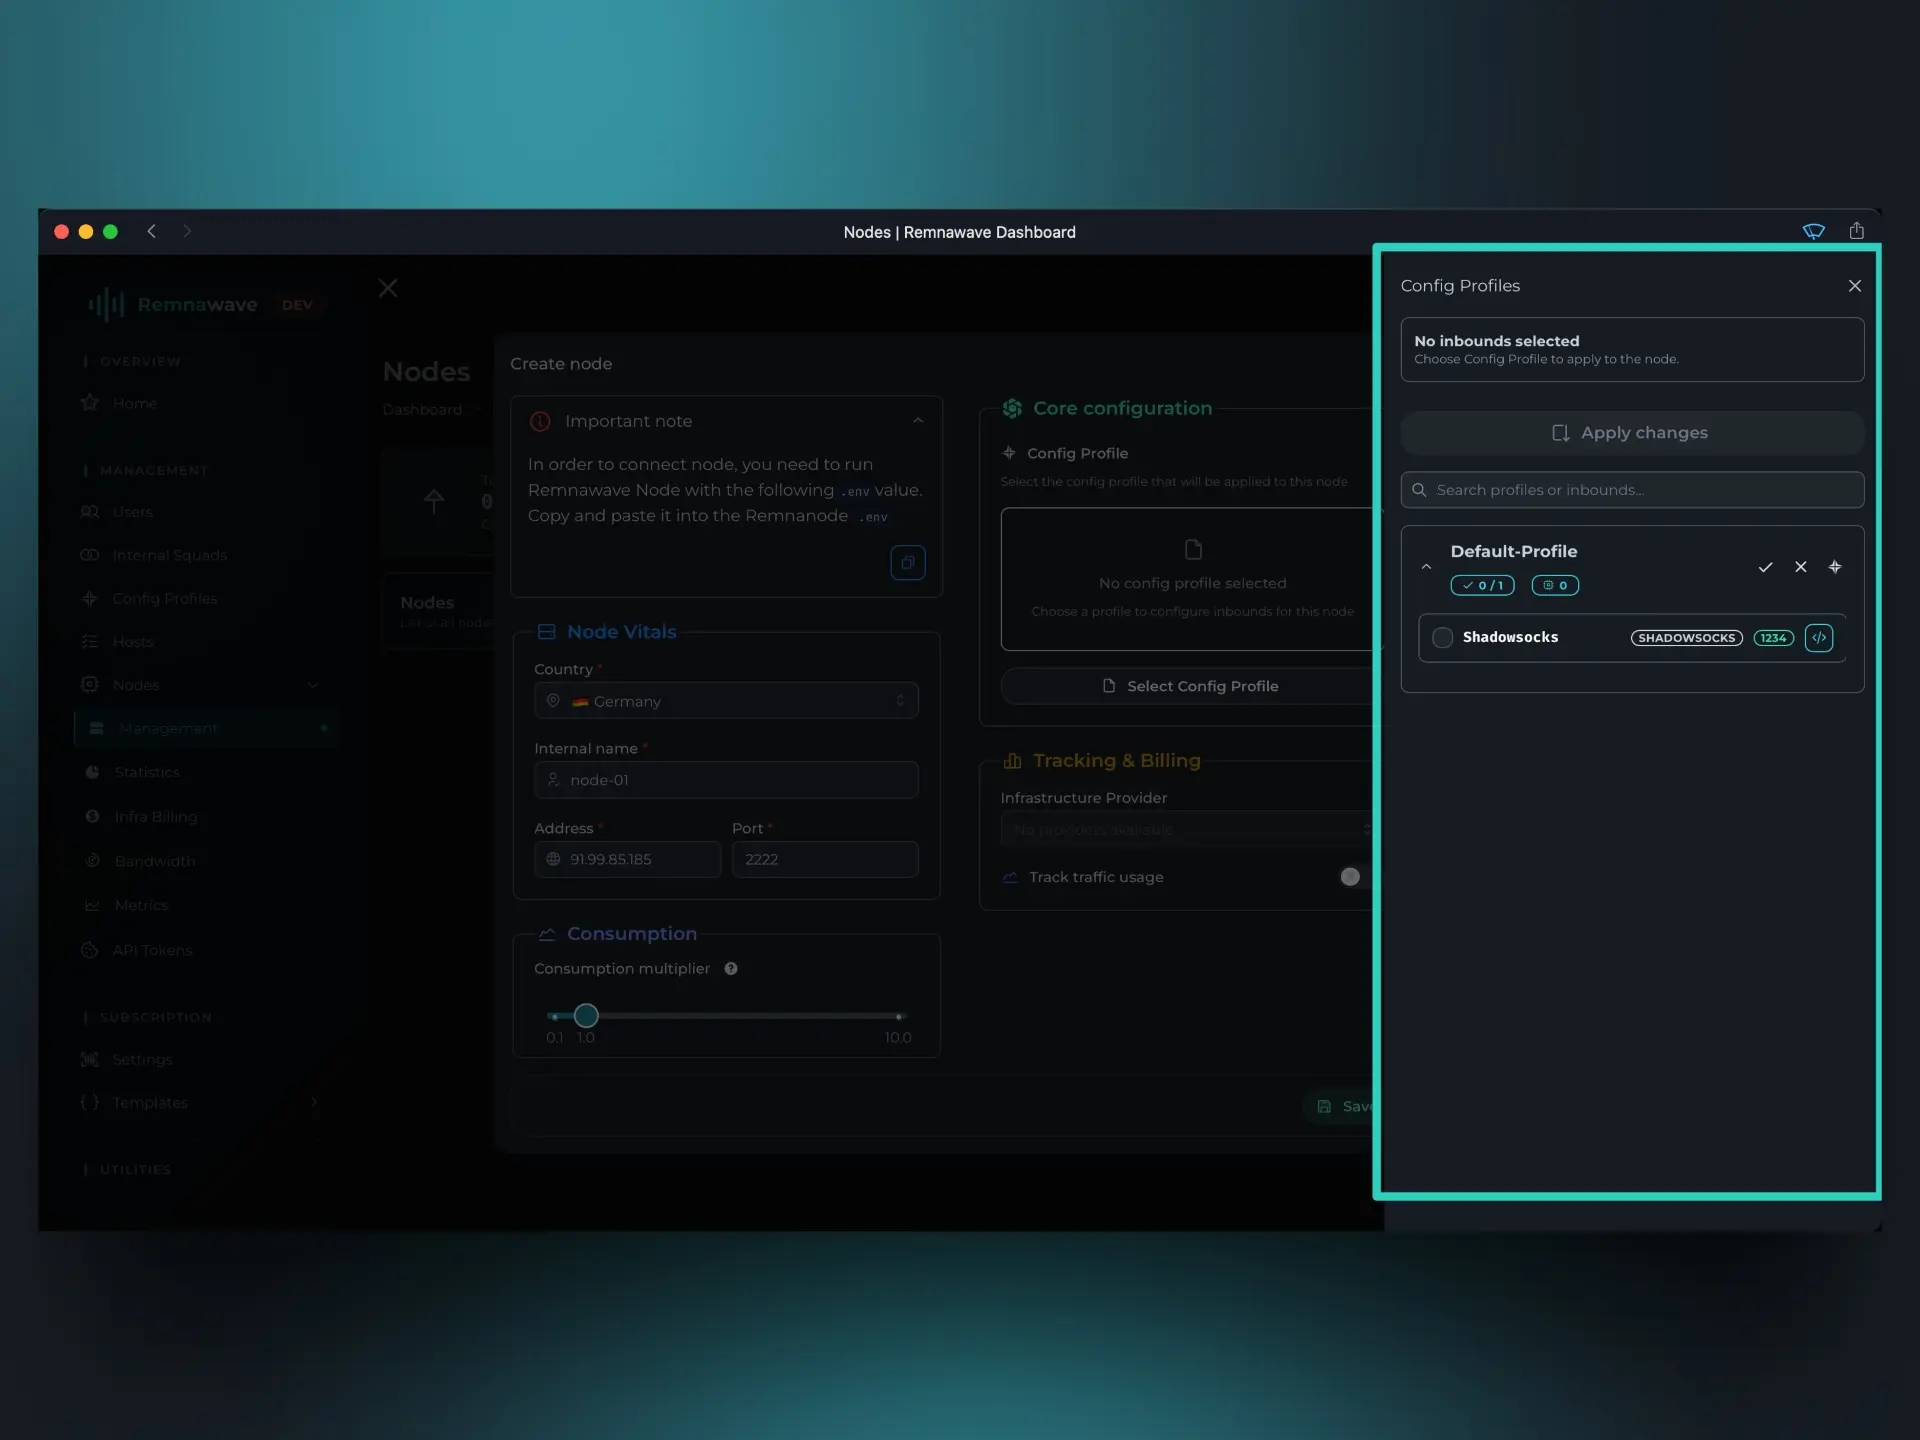
A menu will appear on the right, listing all available Profiles (e.g. Default-Profile) along with the Inbounds (e.g. Shadowsocks) included in each one.
You can select only one Profile per Node, since each profile represents a full Xray-core configuration. Selecting multiple Profiles isn’t technically possible. However, you can create custom Profiles that include multiple Inbounds. For each Node, you’ll be able to choose which Inbounds to enable.
There’s no limit to how many Inbounds can be active within a single Profile.
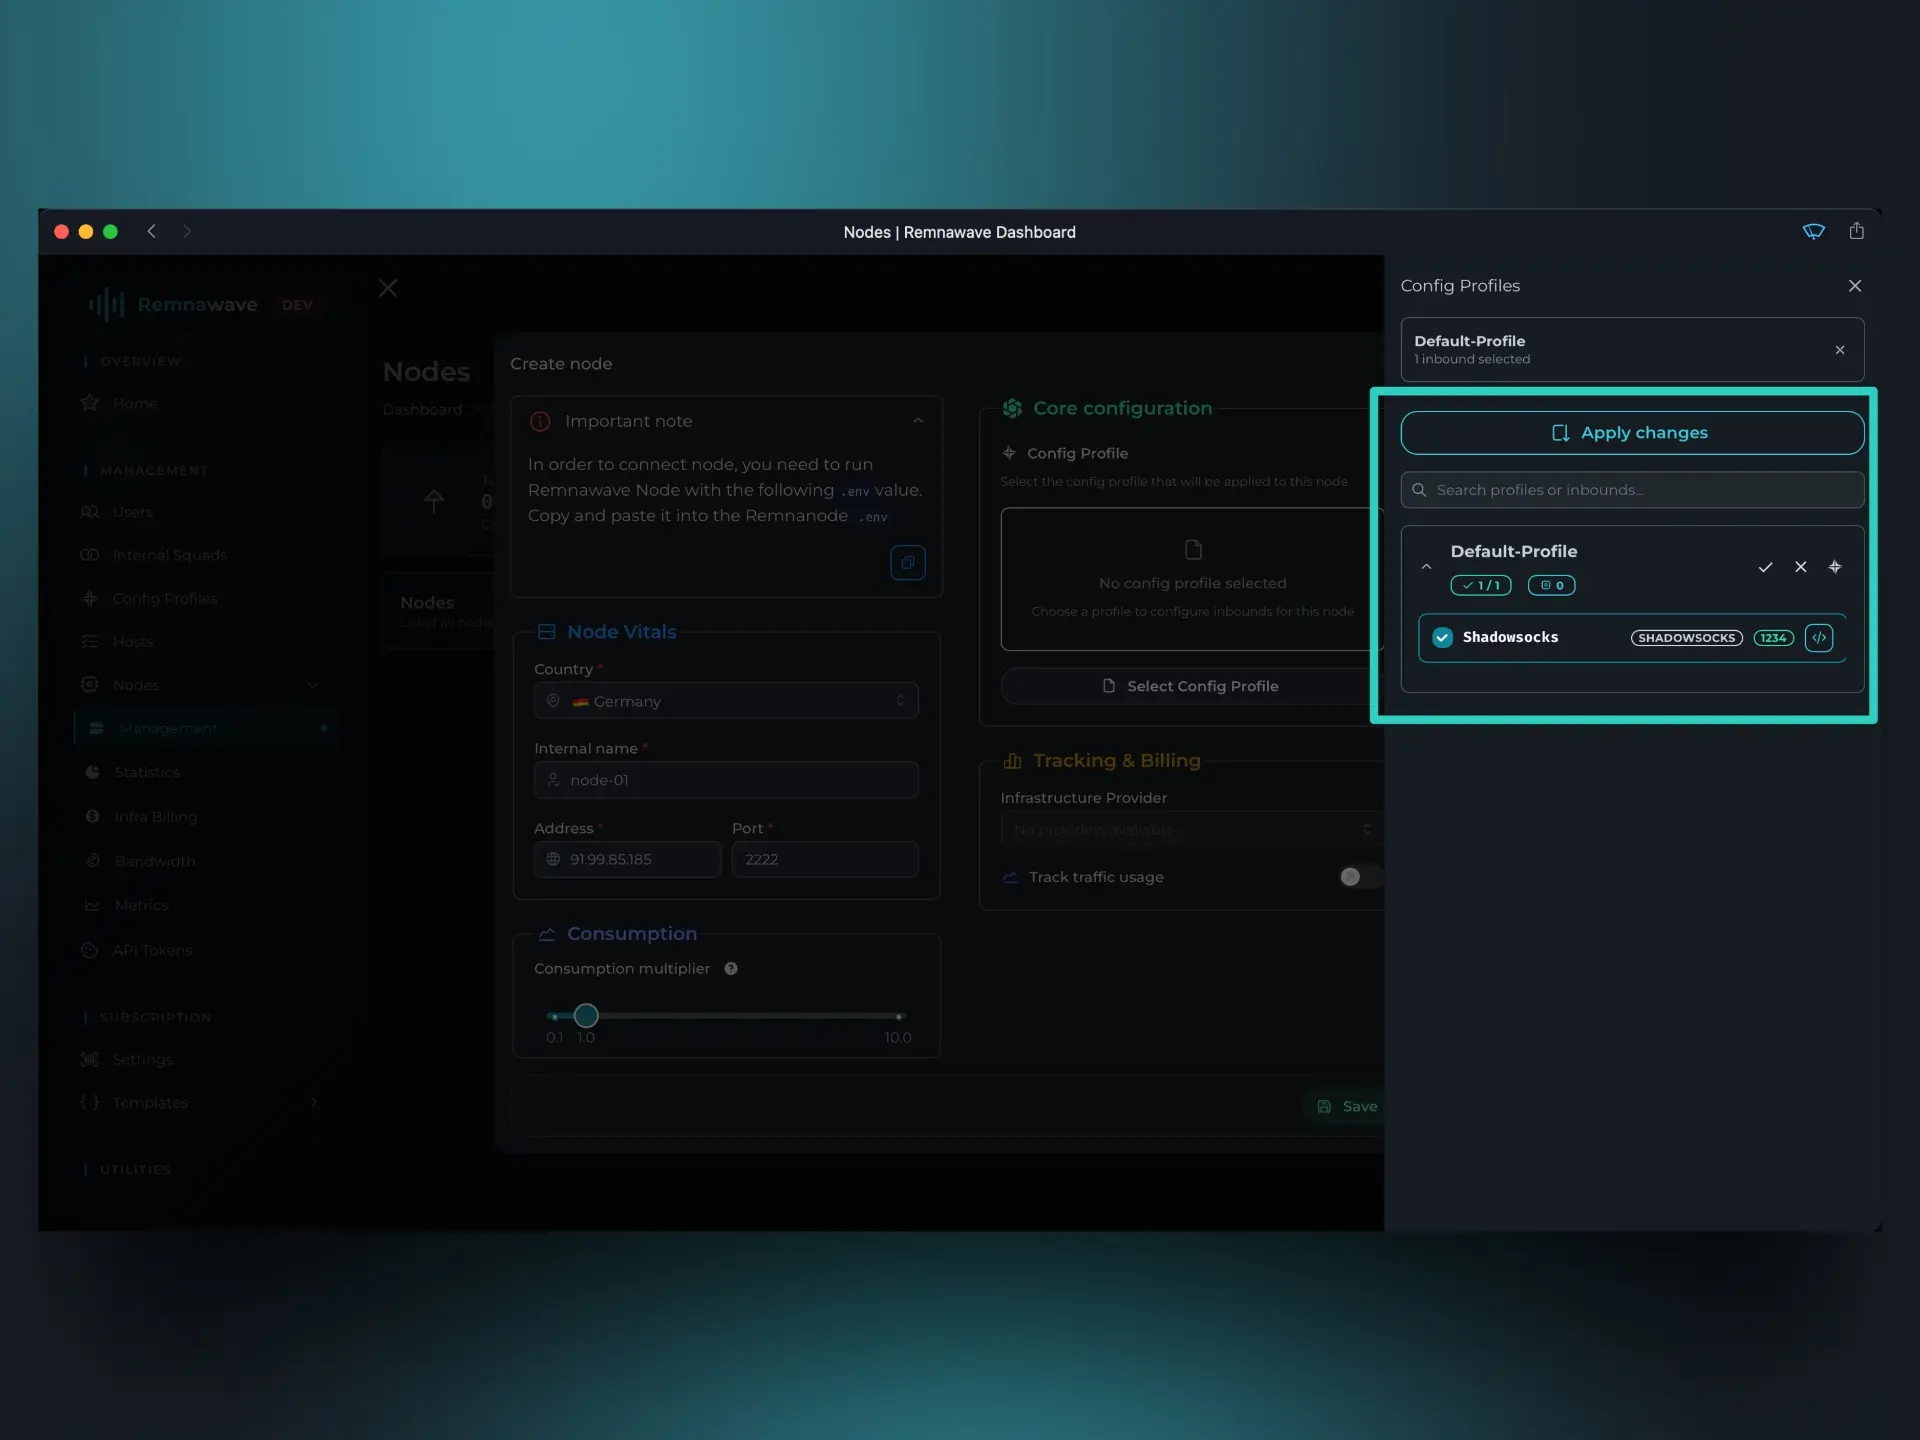
For now, since Shadowsocks is the only available option, select it and click Apply changes to save your choice.
Tracking & Billing

This block contains optional settings that do not need to be filled out.
-
Infrastructure Provider – This option is currently unavailable because no providers have been set up yet — we’ll walk through that later in the guide.
In short, a provider is the service where your server is hosted. Once you create one, you’ll be able to link it to a Node, and Remnawave will show that information in the Node list. -
Track traffic usage – This checkbox determines if Remnawave will actively track usage against a set limit for this Node. The Panel always records traffic, but if you enable and configure this option, it will send you a notification when the limit is reached. The limit will also reset on the specified day.
For example:
Imagine you’ve rented a VPS from Hetzner, which offers 20 TB of monthly traffic. Hetzner measures this as combined incoming + outgoing traffic.
Since Xray generates traffic in both directions, your practical limit is 10 TB of actual usage. If Hetzner resets traffic usage on the 1st of every month, you would configure Remnawave to do the same.
Based on this, we can set the following parameters:
Traffic limit– The traffic cap in GB. For 10 TB, this equals 10,240 GB.Reset day– The day of the month when the traffic counter resets. In this case,1.Notification %– The usage percentage that triggers a notification. For example,90.
With these settings, Remnawave will notify you when 9 TB of traffic has been used. Then, on the 1st of the month, the counter resets and the cycle starts over.
Node Management
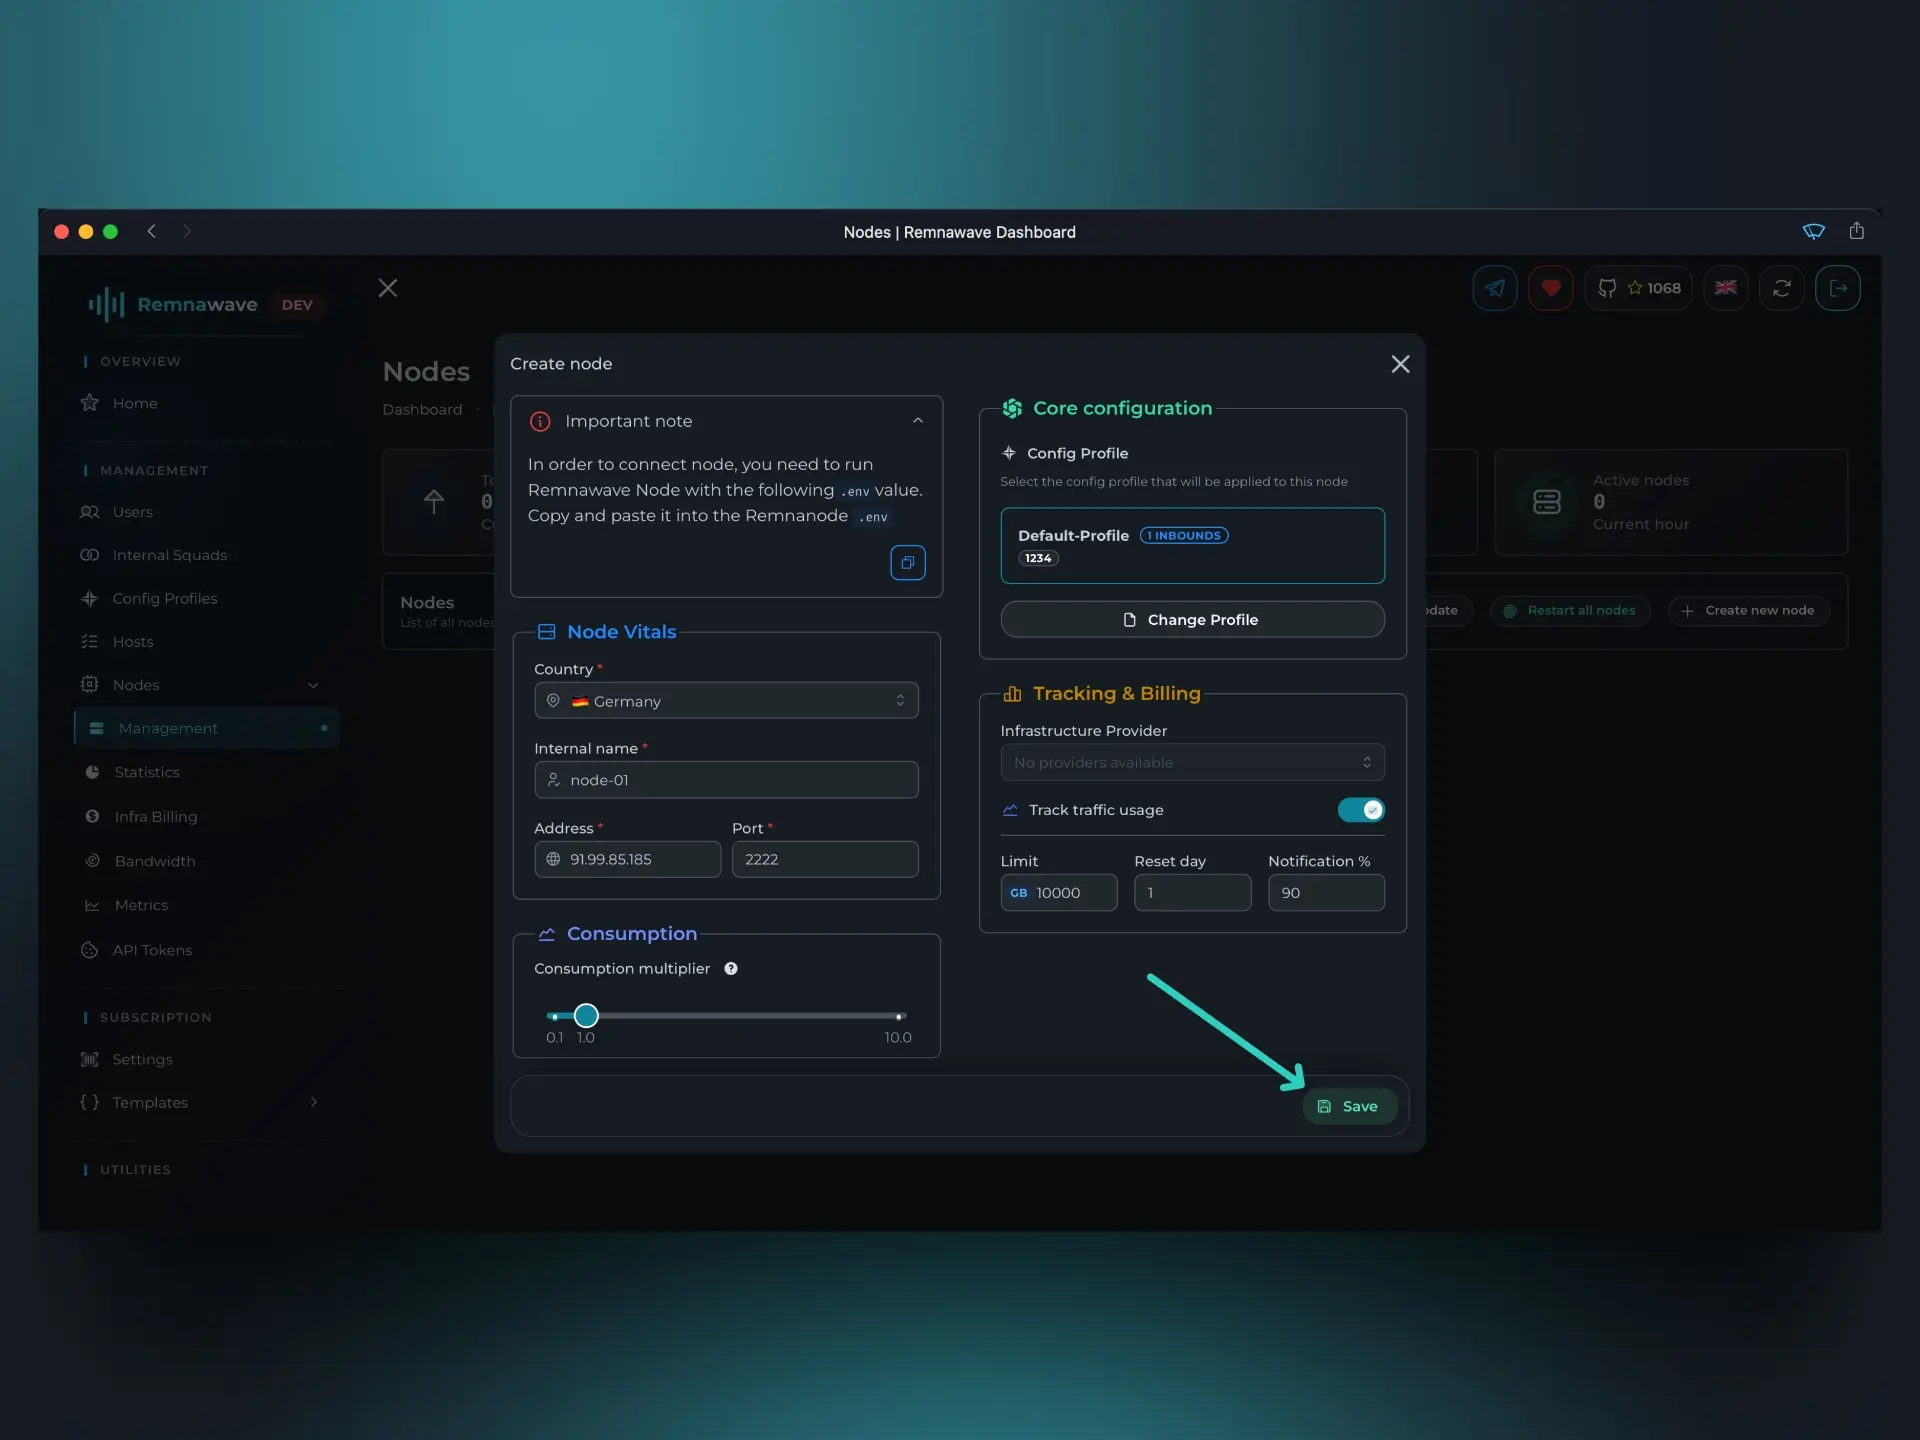
Once all required fields are filled in, click Save in the bottom right corner to create the Node.
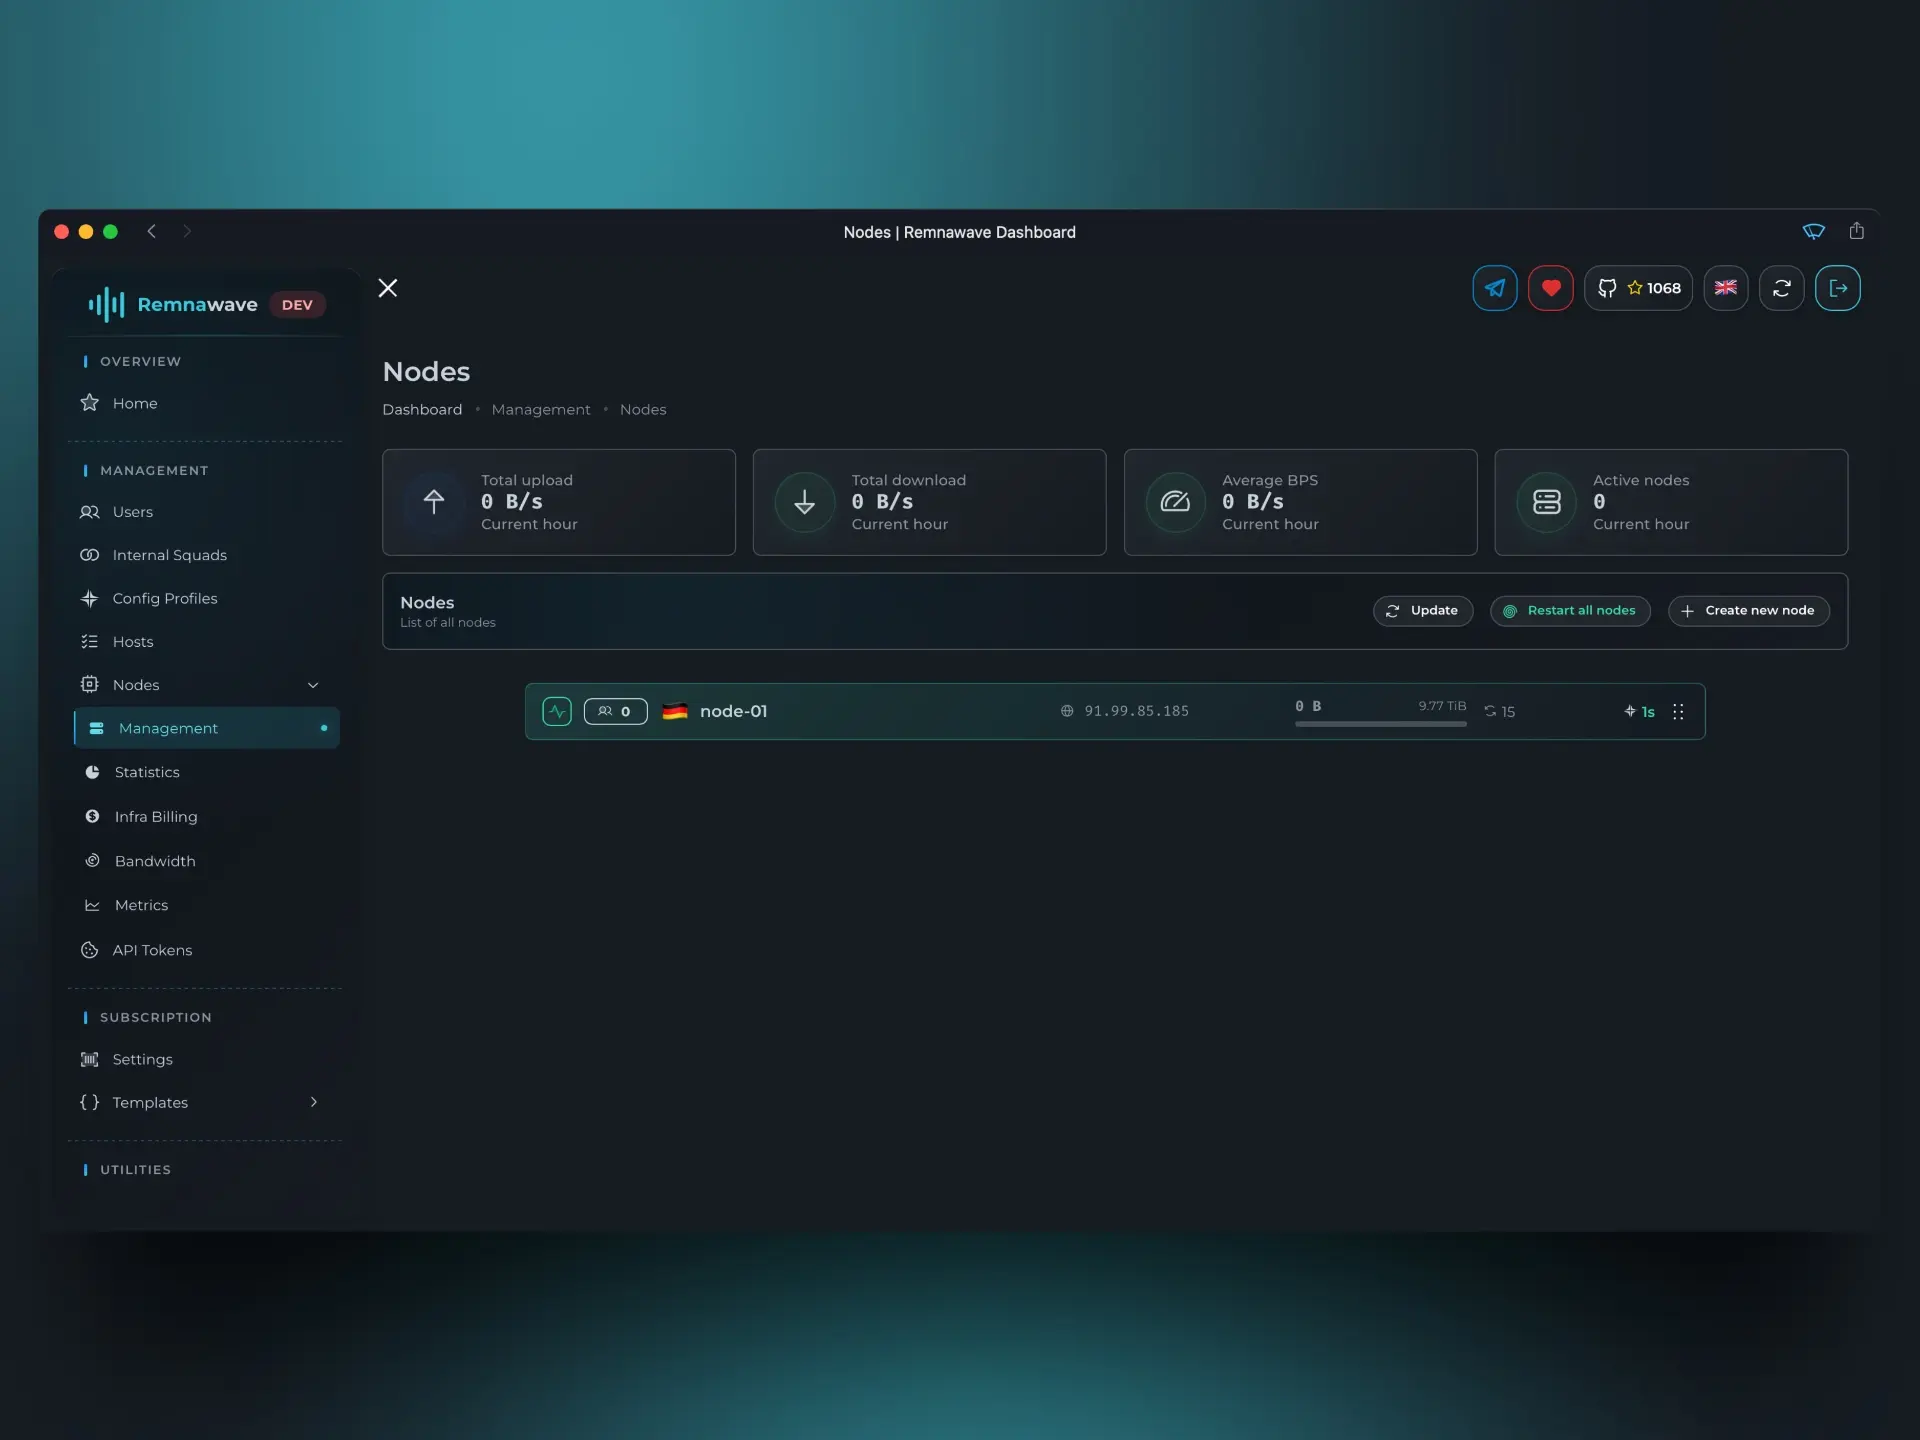
As you can see, the Node you created now appears in the Node list. Within a few seconds, the Remnawave Panel will connect to the Node and start the Xray-core.
You can monitor the Node’s status by looking at the icon to the left of its card and the card’s background color.
In the center of the card, you’ll see the Address assigned to the Node during creation. To the right of that, the current traffic usage is displayed along with the number of days remaining until the counter resets (traffic refill). Further to the right, you’ll find the uptime of the Xray-core.
Clicking on the Node card will open a modal window where you can edit its settings and view more details.
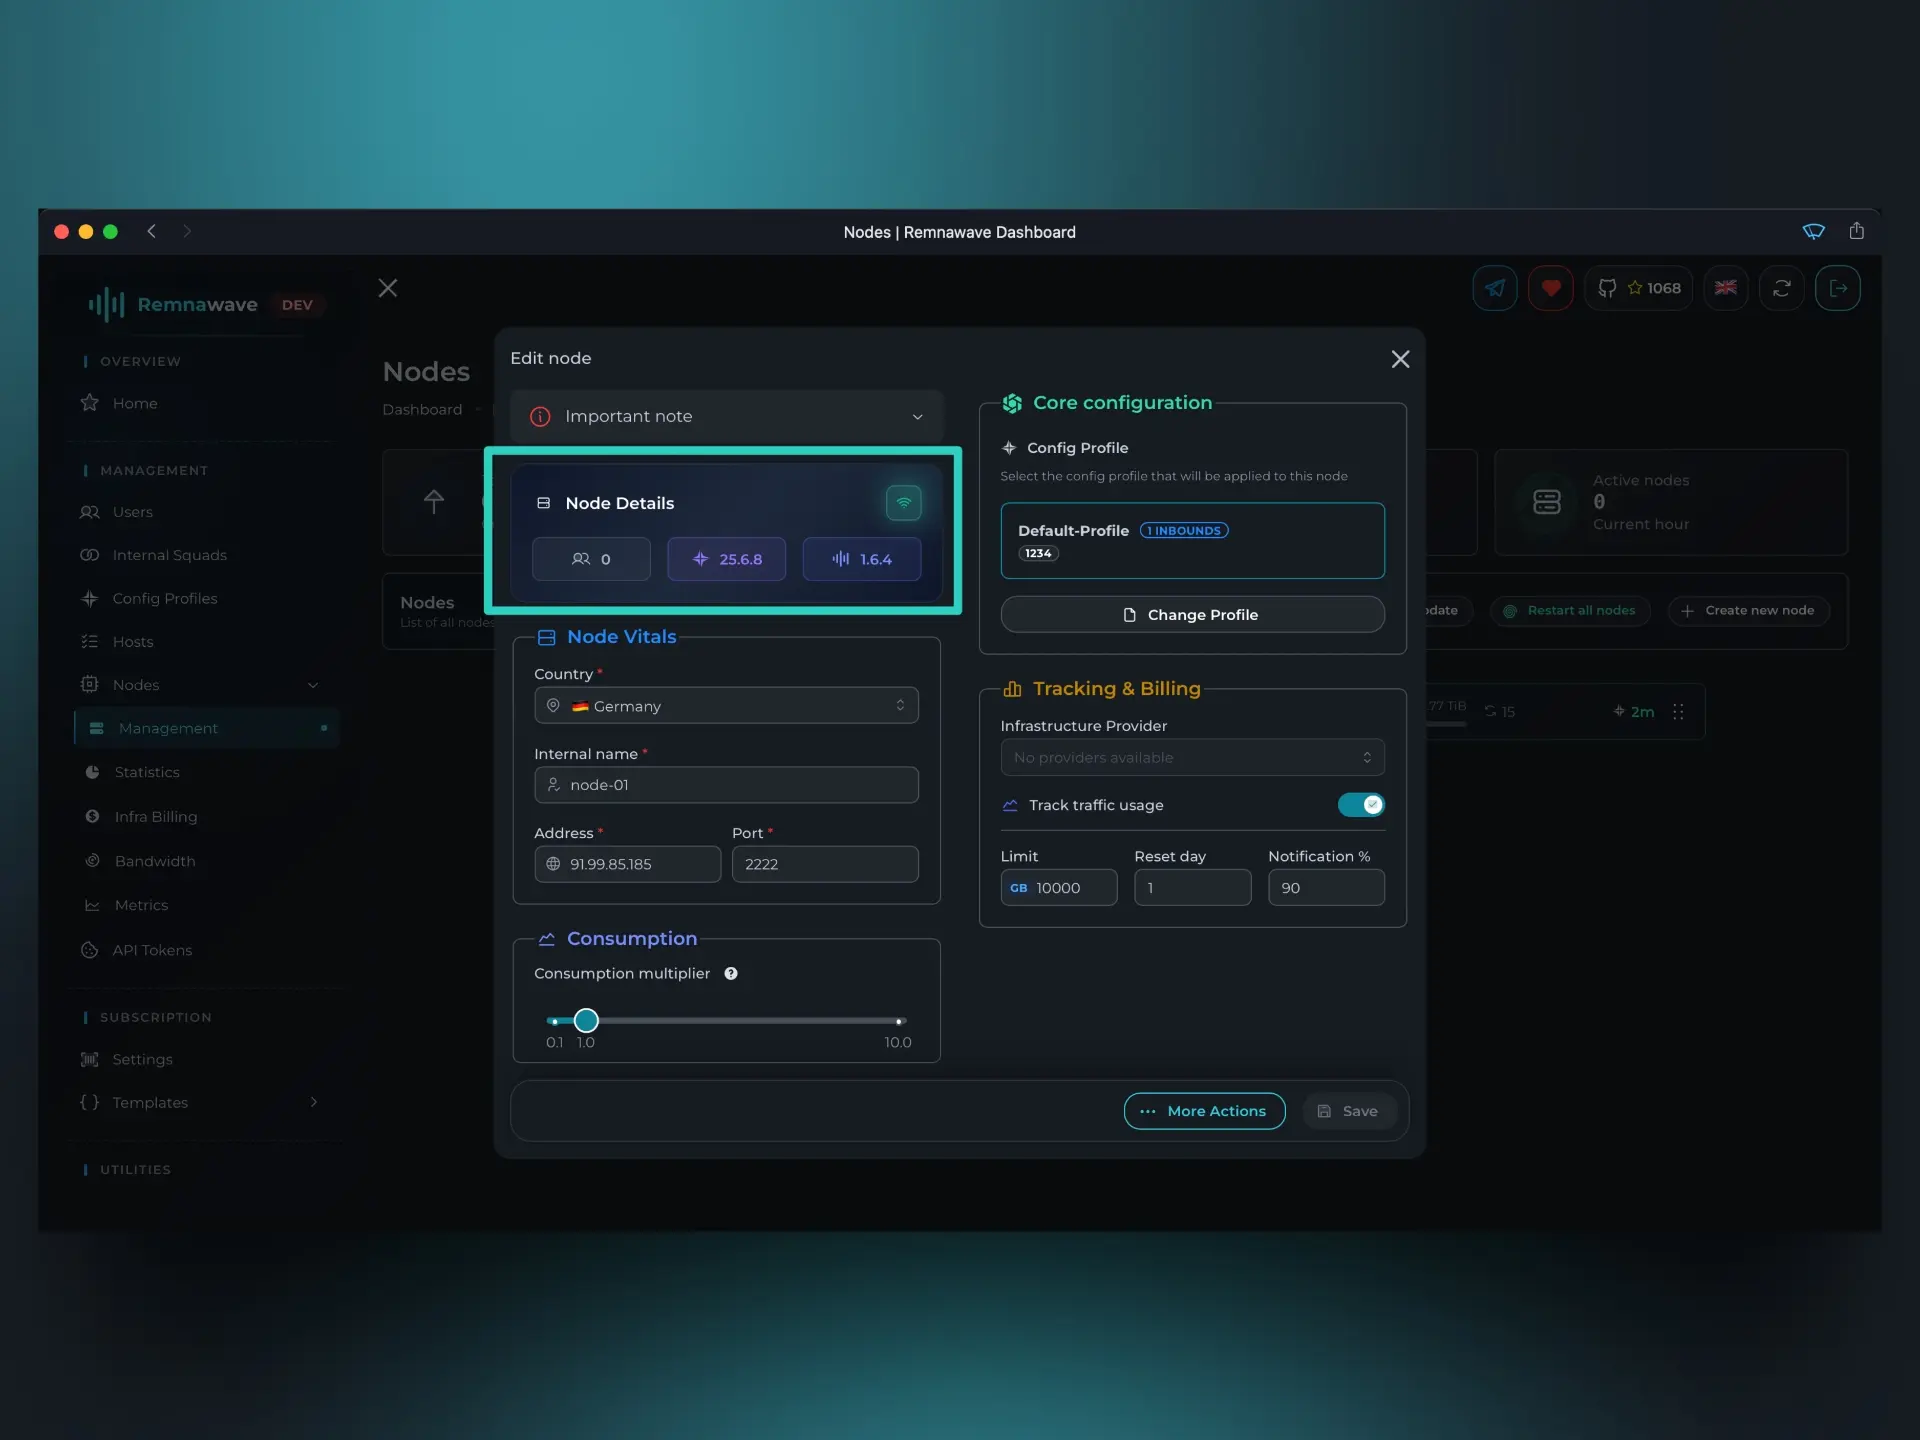
The highlighted block appears only after a Node has been created and connected. The labels indicate:
- Left: Number of connections to this Node (duplicates are counted).
- Center: Version of the Xray-core running on the Node.
- Right: Version of the Remnawave Node.
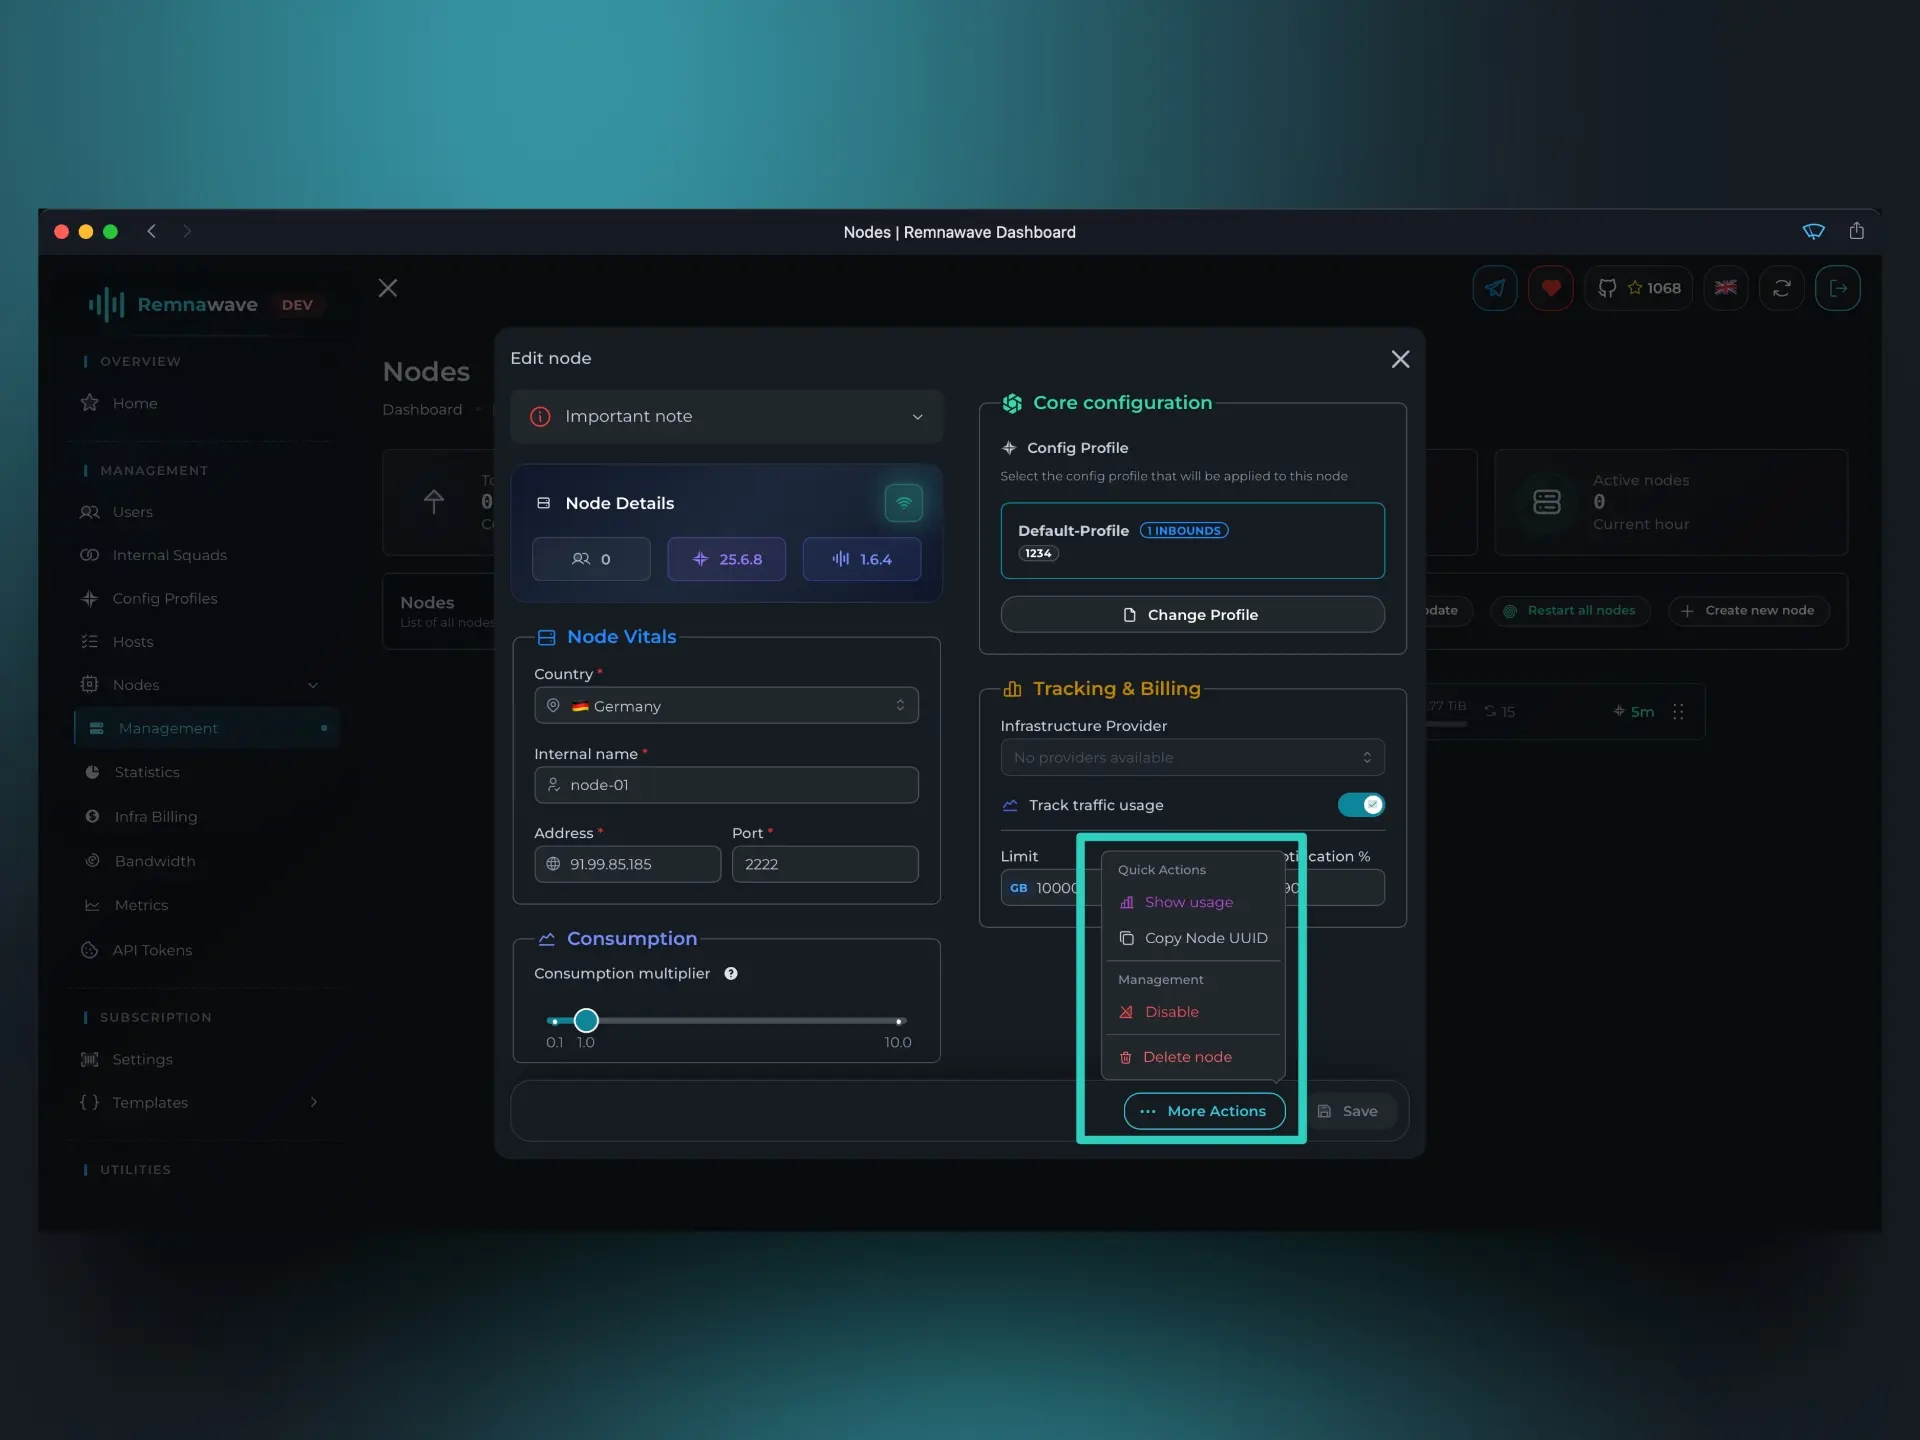
The More actions button is now visible, giving you access to additional features:
Show usage– Opens a modal displaying detailed usage statistics for the Node by user over a selected time period. Since there’s no data yet, we’ll revisit this later.Copy Node UUID– Copies the Node’s UUID, useful for API operations.Disable– Deactivates the Node.Delete– Permanently removes the Node.
📄️ Hosts
After creating your first Node, the next step is to configure a Host.