Users
Create a user
Navigate to the Users page and click Create user.
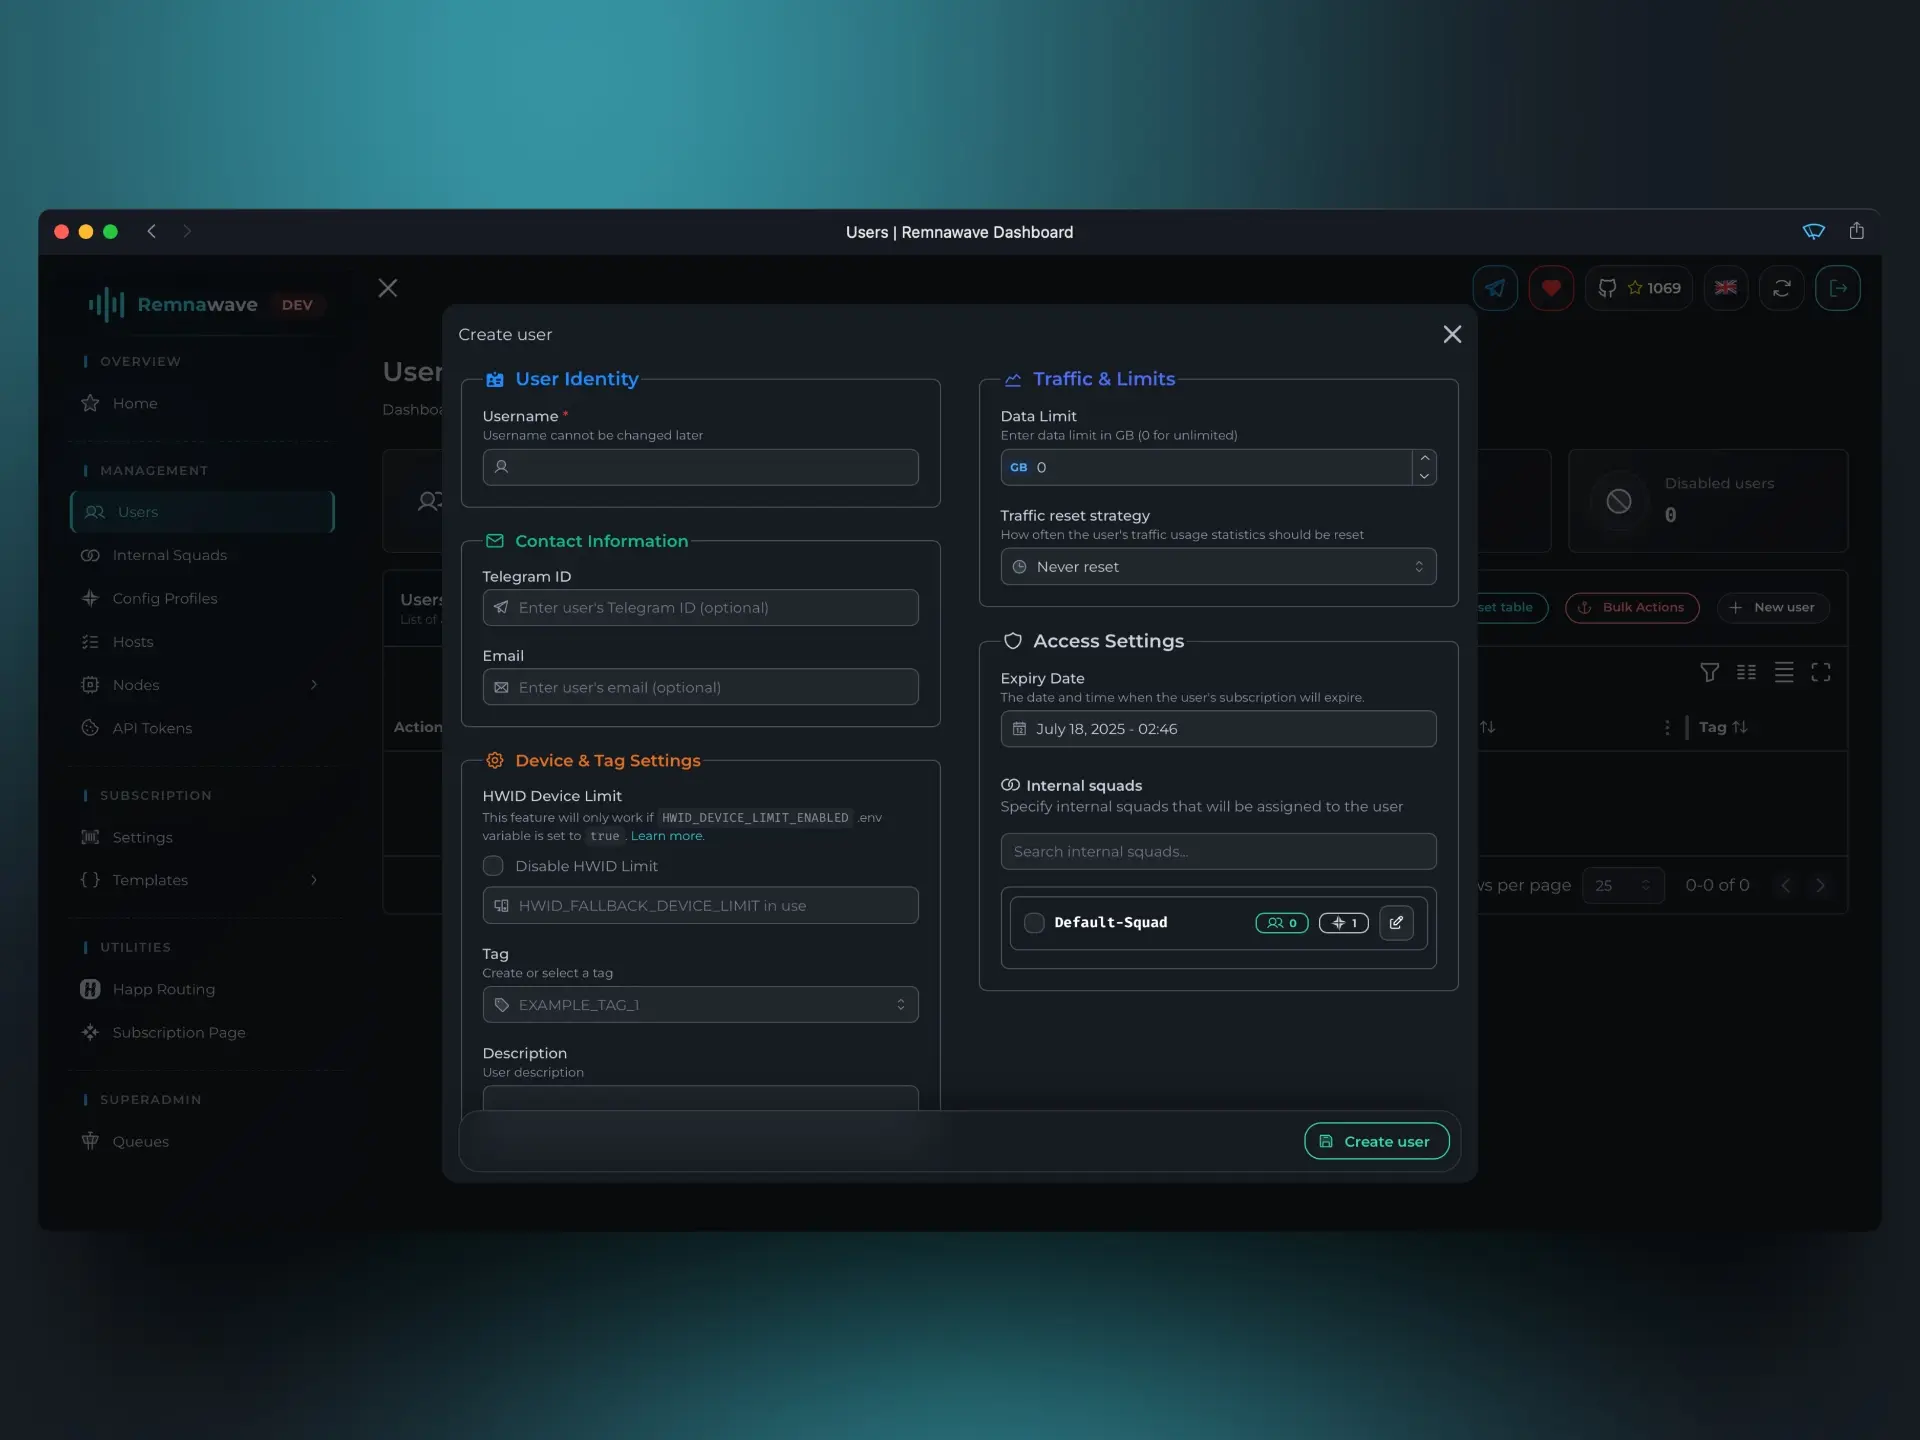
Start by choosing a username. It can be anything, but must not contain spaces.
Next, in the Traffic & Limits section, set the user’s data restrictions:
Data limit– The traffic quota in GB.Traffic reset strategy– How often the traffic counter resets for this user.
For this example, we’ll set a 1 GB limit with a daily reset.
In the Access Settings section, configure the subscription expiration date and assign the user to one or more Internal Squads.
Let’s set the subscription to expire in one month and assign the only available Squad.
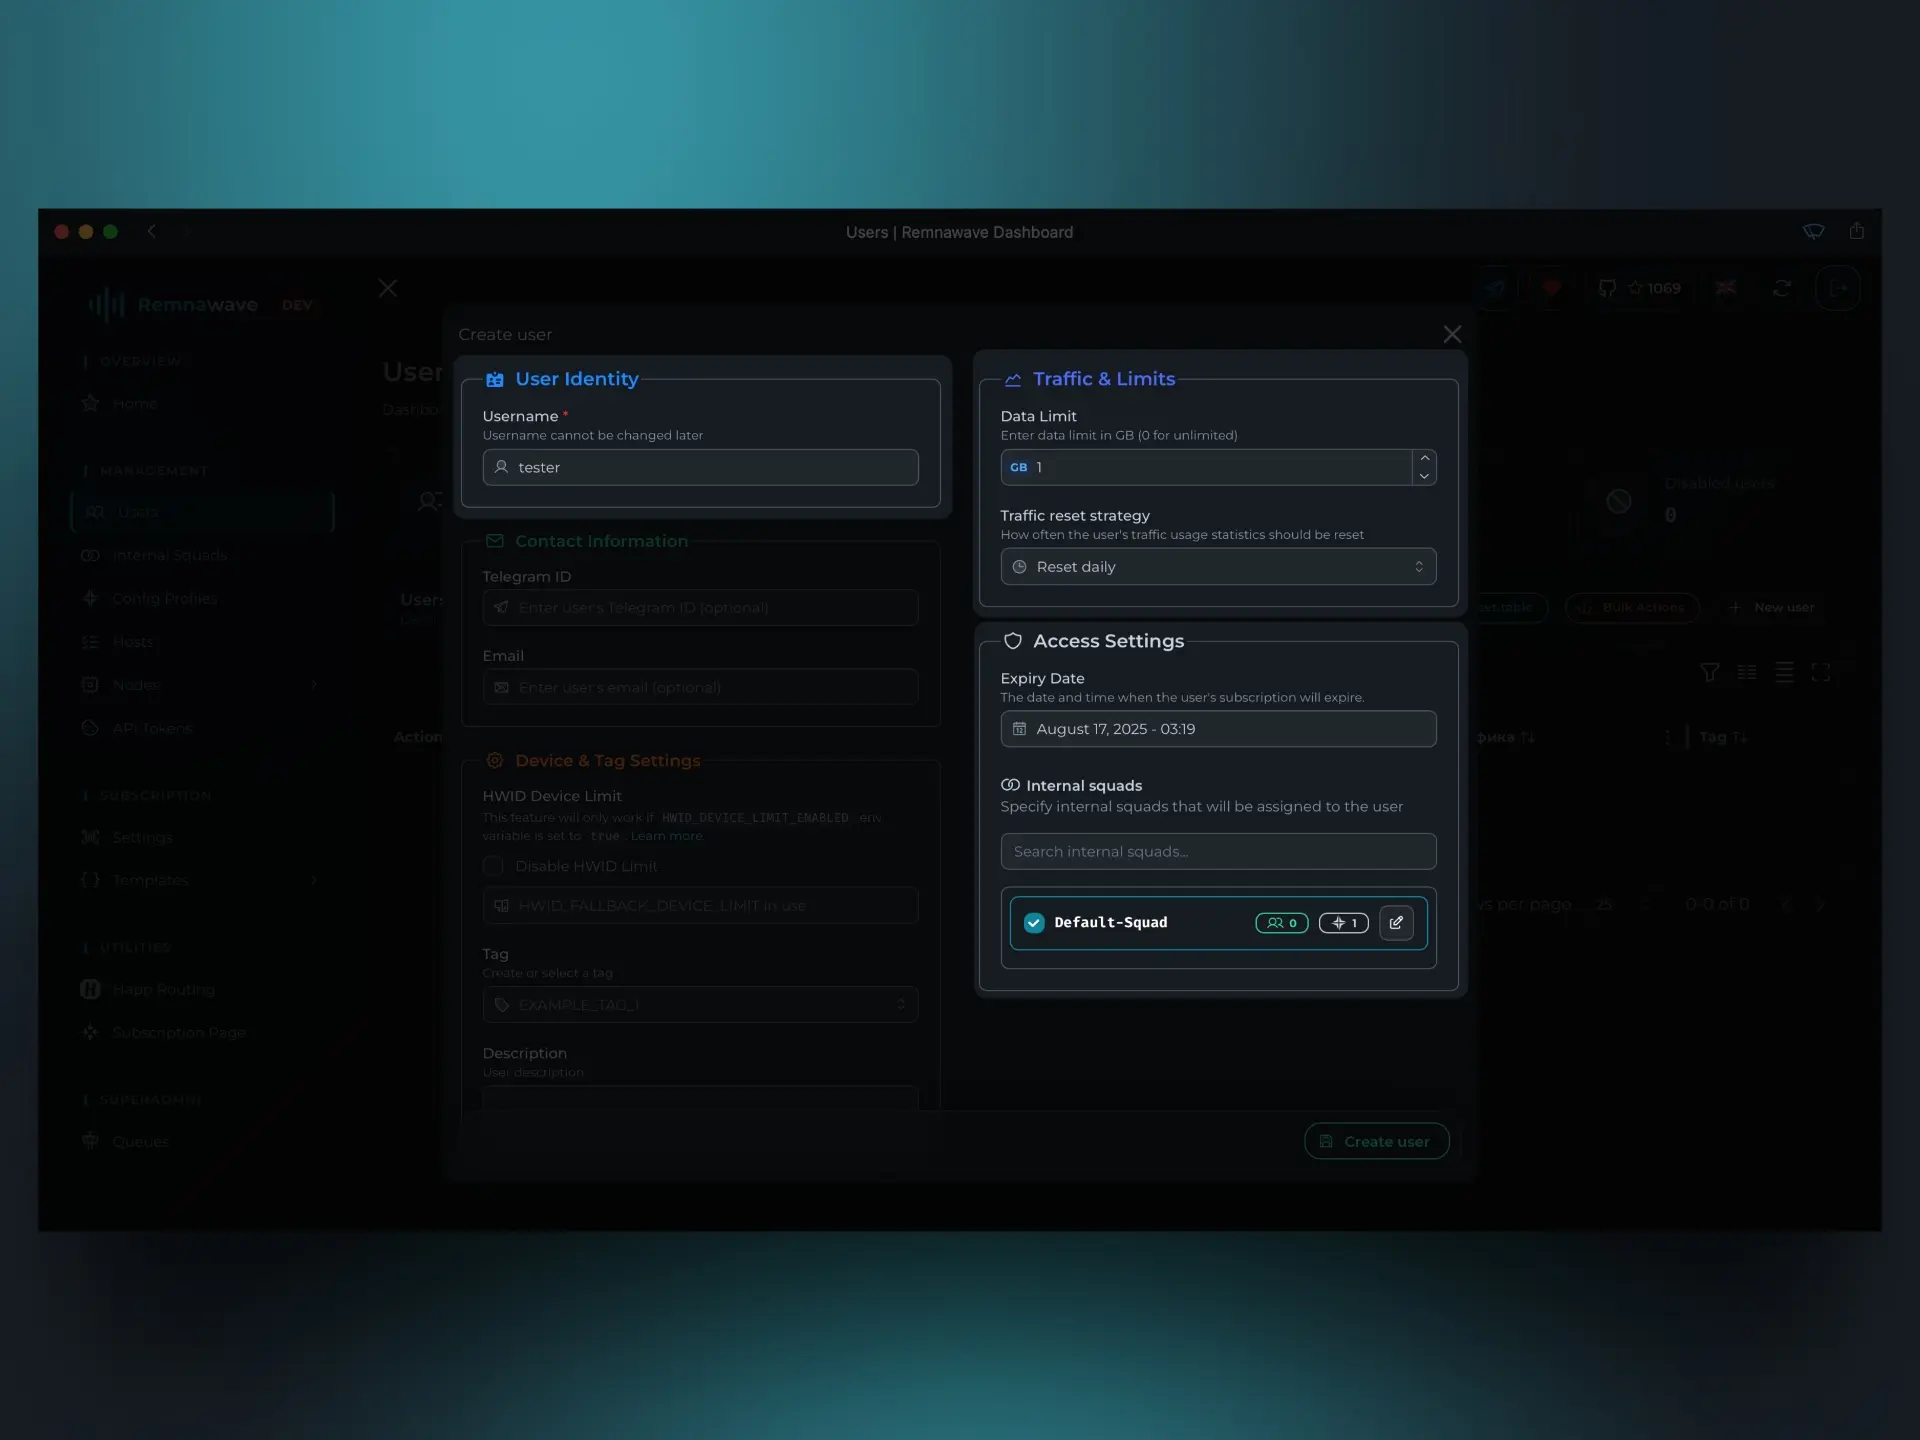
Create the user by clicking Create user.
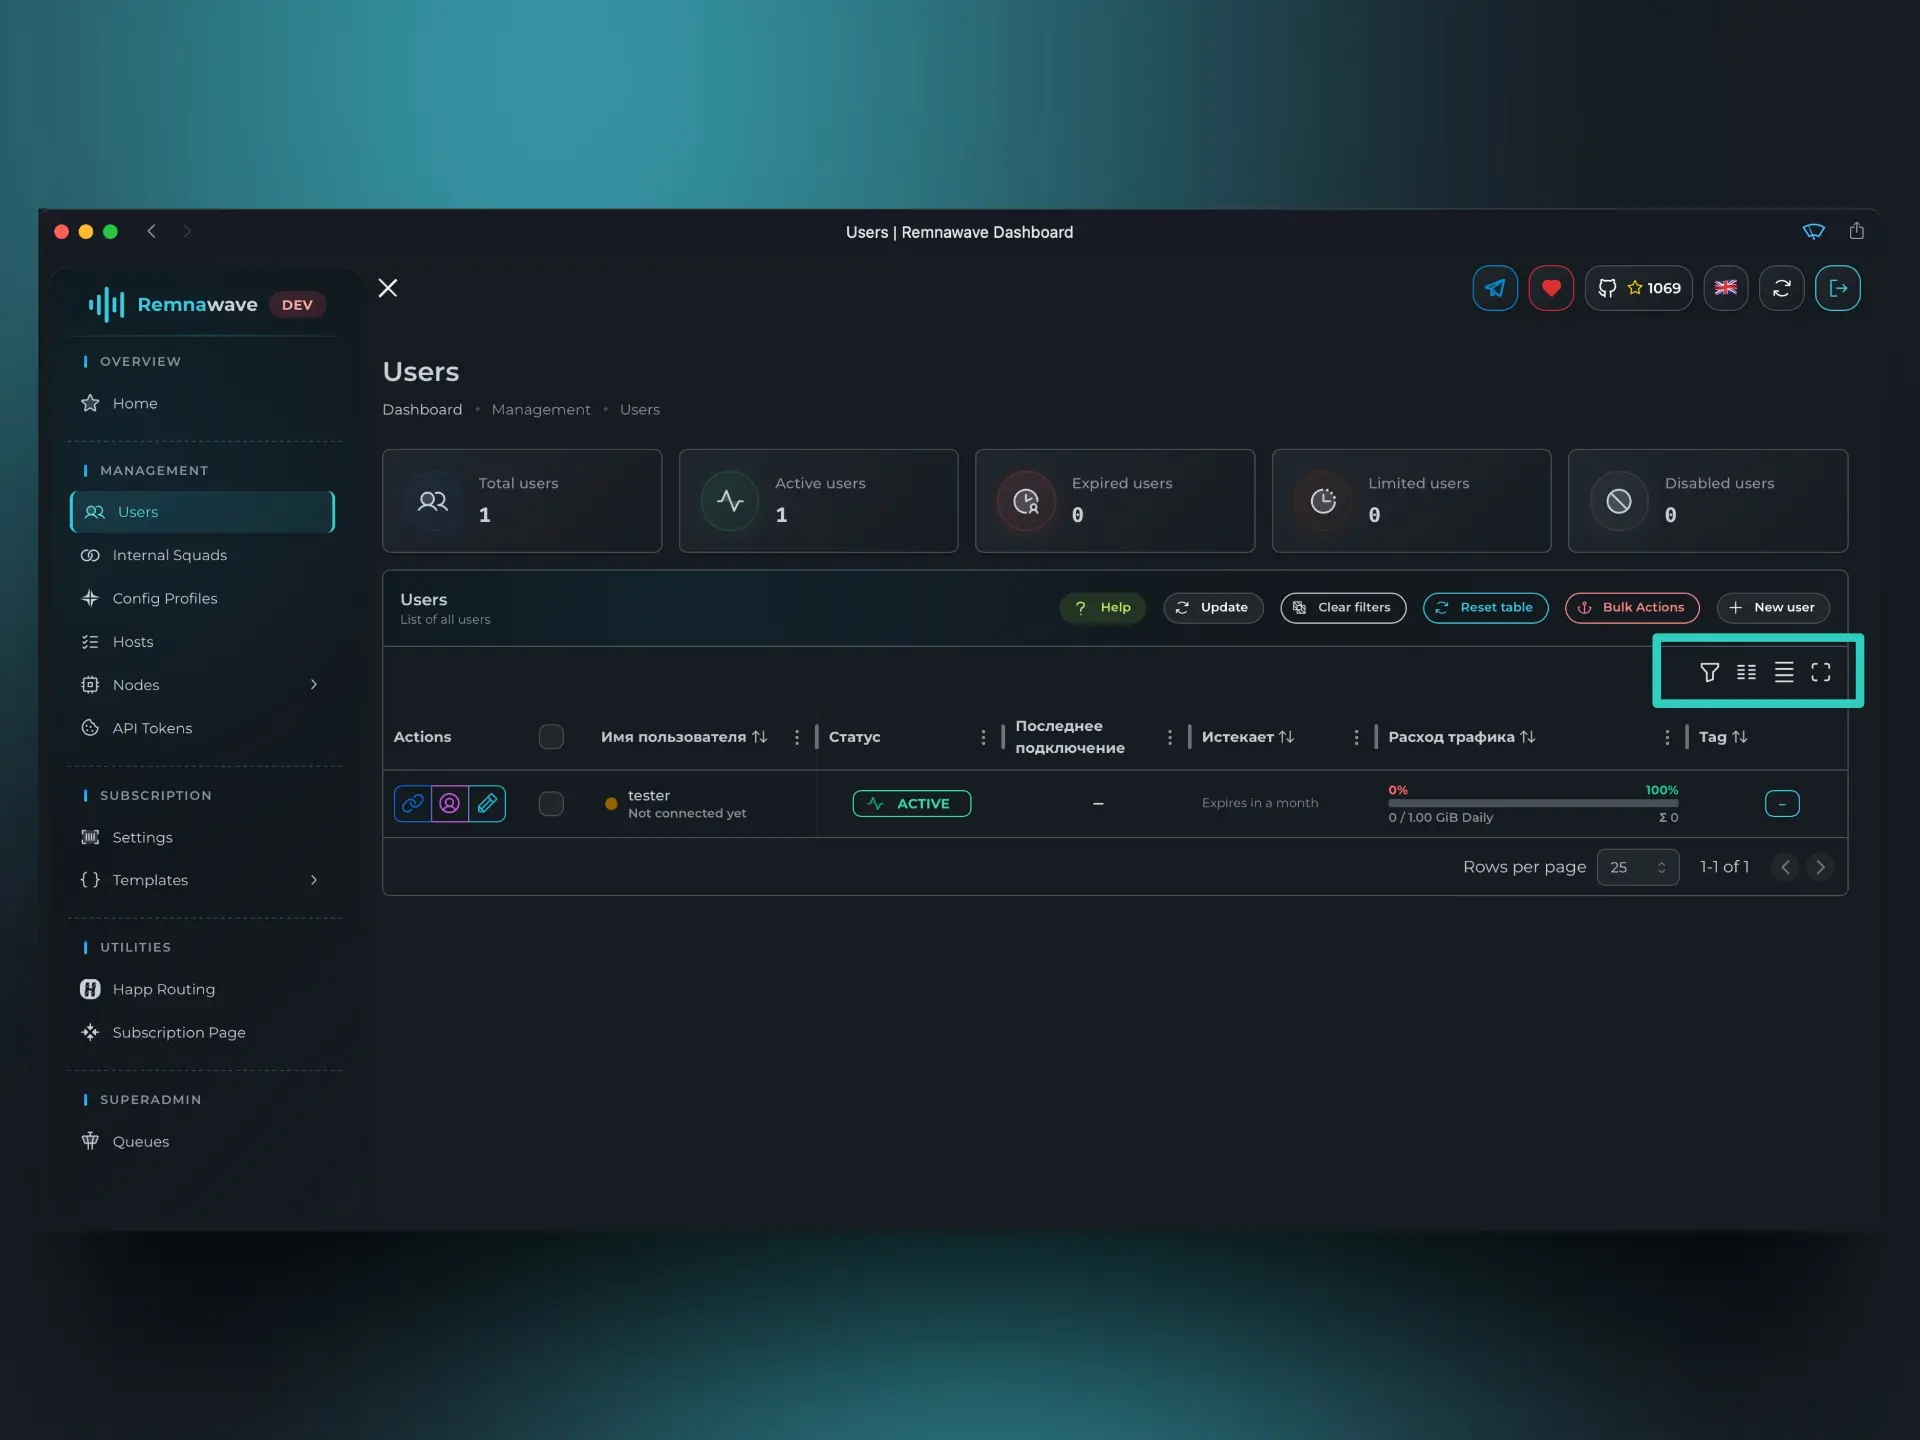
After creating the user, you’ll return to the user list.
Here, you can customize which columns are visible, toggle full-screen mode, and search users by specific fields — useful tools to help you efficiently manage an expanding user base.
User Management Tools
If you click the pencil icon to open the Edit user menu, you’ll notice a new button — More actions.
This menu includes several useful tools beyond basic user management:
Detailed Info– Includes extra information such as VLESS UUIDs and Happ Crypto links.Show usage– Displays detailed traffic statistics for the user.HWIDs and Devices– Shows hardware and device info reported by client apps.Note: Not all apps support this feature. If it’s empty, the user hasn’t used a compatible client.
Subscription QR Code– Generates a scannable QR code for the user’s subscription URL.Subscription links– Displays raw subscription links likevless://,ss://, etc.Request History– Lists all requests the user’s client apps made to fetch the subscription.
Back on the Users page, you’ll see a red button with a gear icon on the right — this is the Bulk Actions menu.
Clicking it opens a panel where you can perform actions across all users.
If you want to target specific users only, you have two options:
- Use the checkboxes on the left to select them manually.
- Or use the sorting/filtering tools on the right, then click
Bulk actions.
From the Bulk Actions menu, you can:
- Activate or deactivate selected users
- Set a unified data limit and traffic reset strategy
- Extend subscription time for all selected users
- And more
Get the Subscription URL
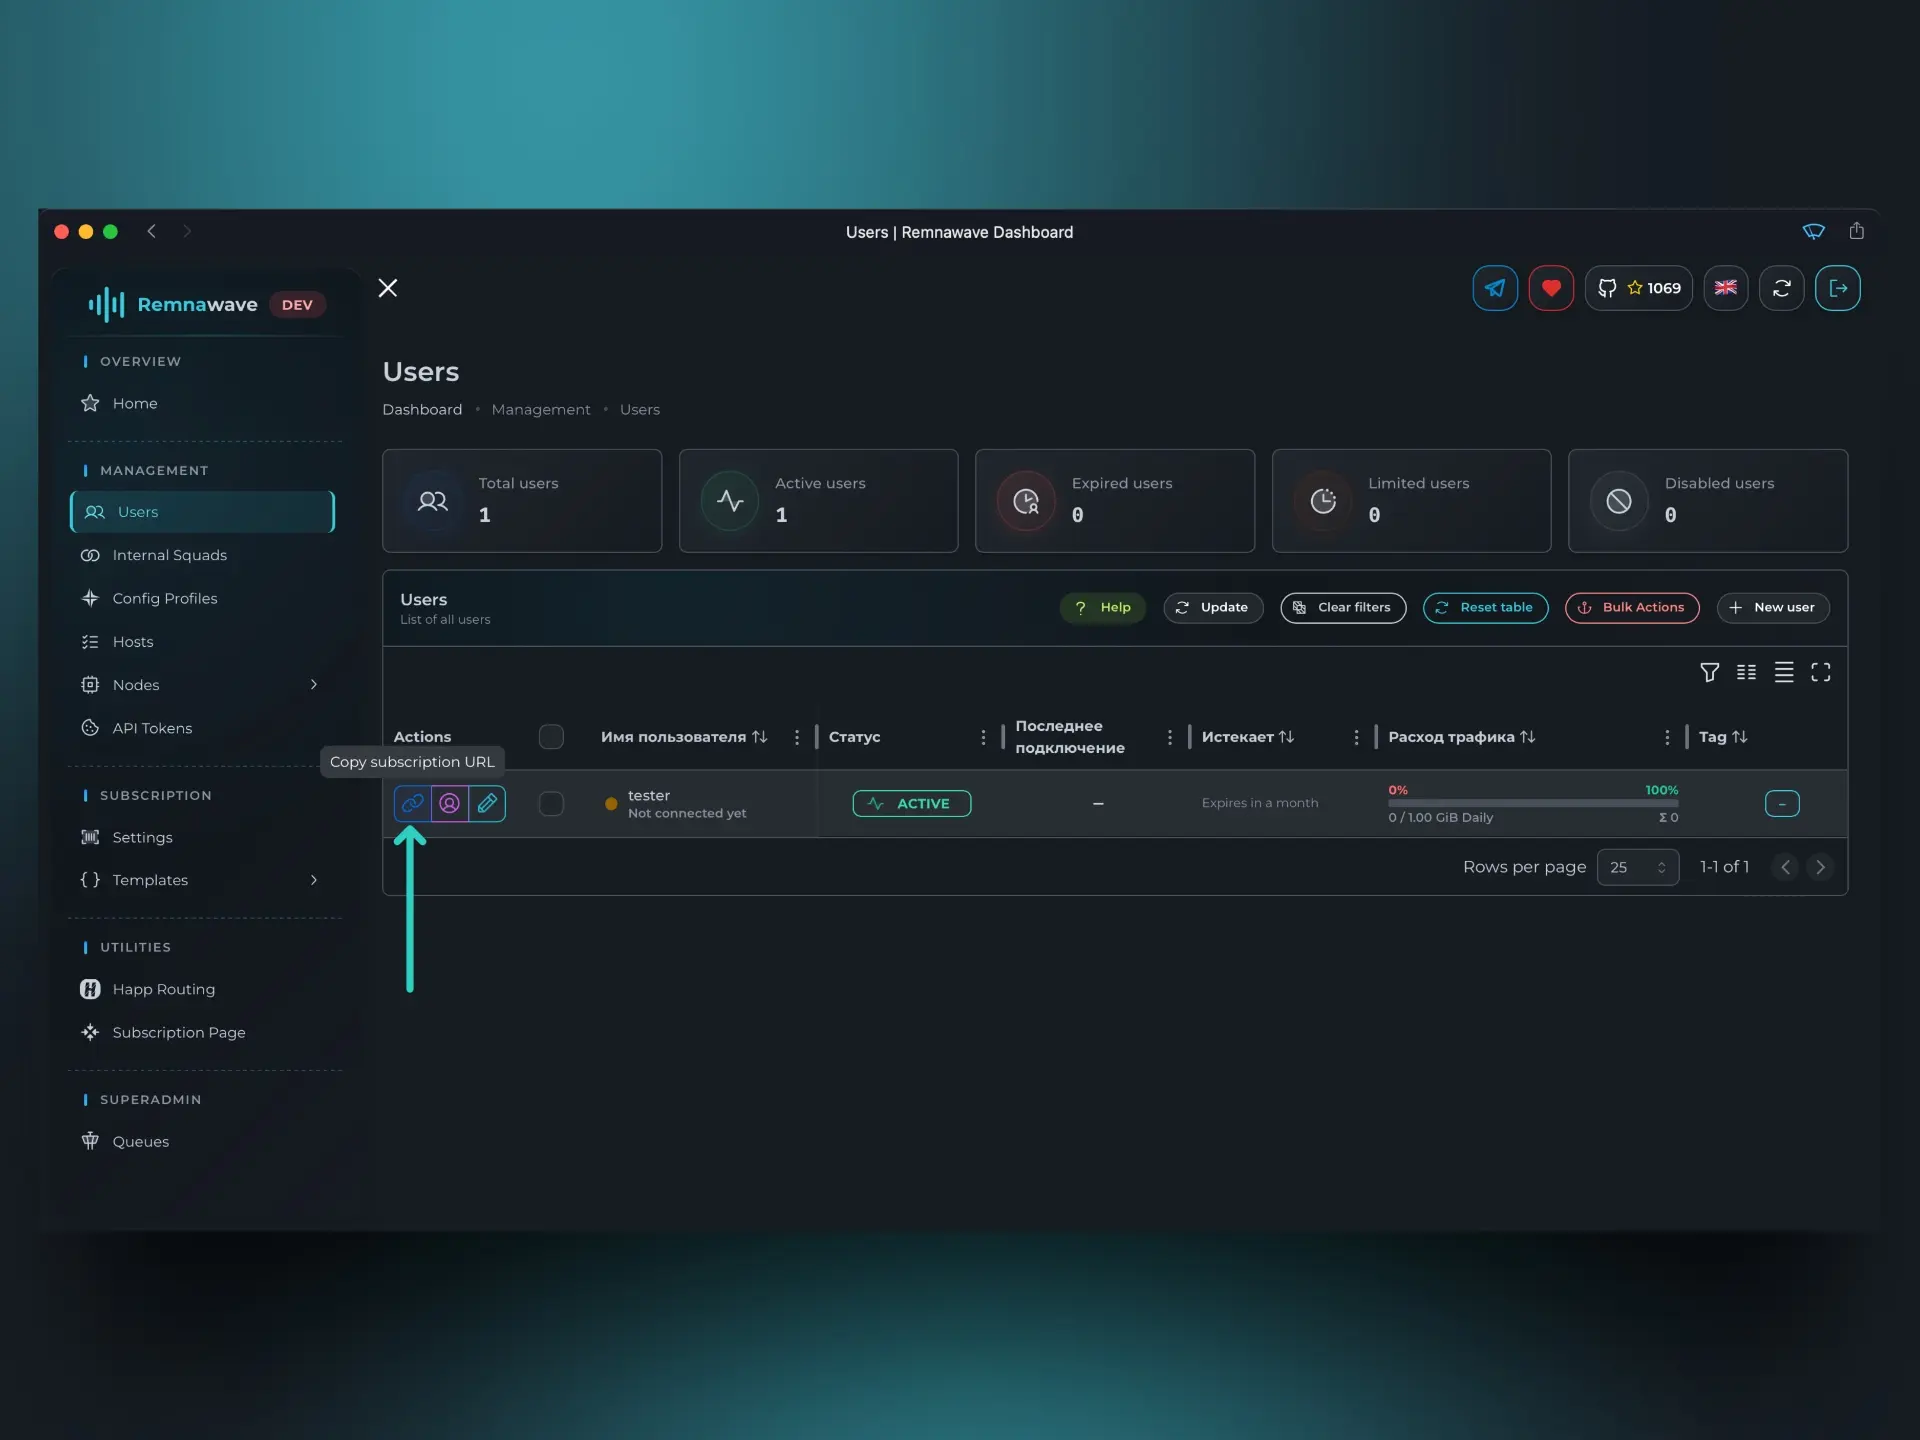
After creating the user, you can easily get their subscription URL by clicking the link icon to copy it to your clipboard.
Alternatively, click the pencil icon next to it to open the Edit user menu, where the subscription URL is also available.

Opening this link in a browser will display the Subscription Page, confirming that everything is set up correctly.
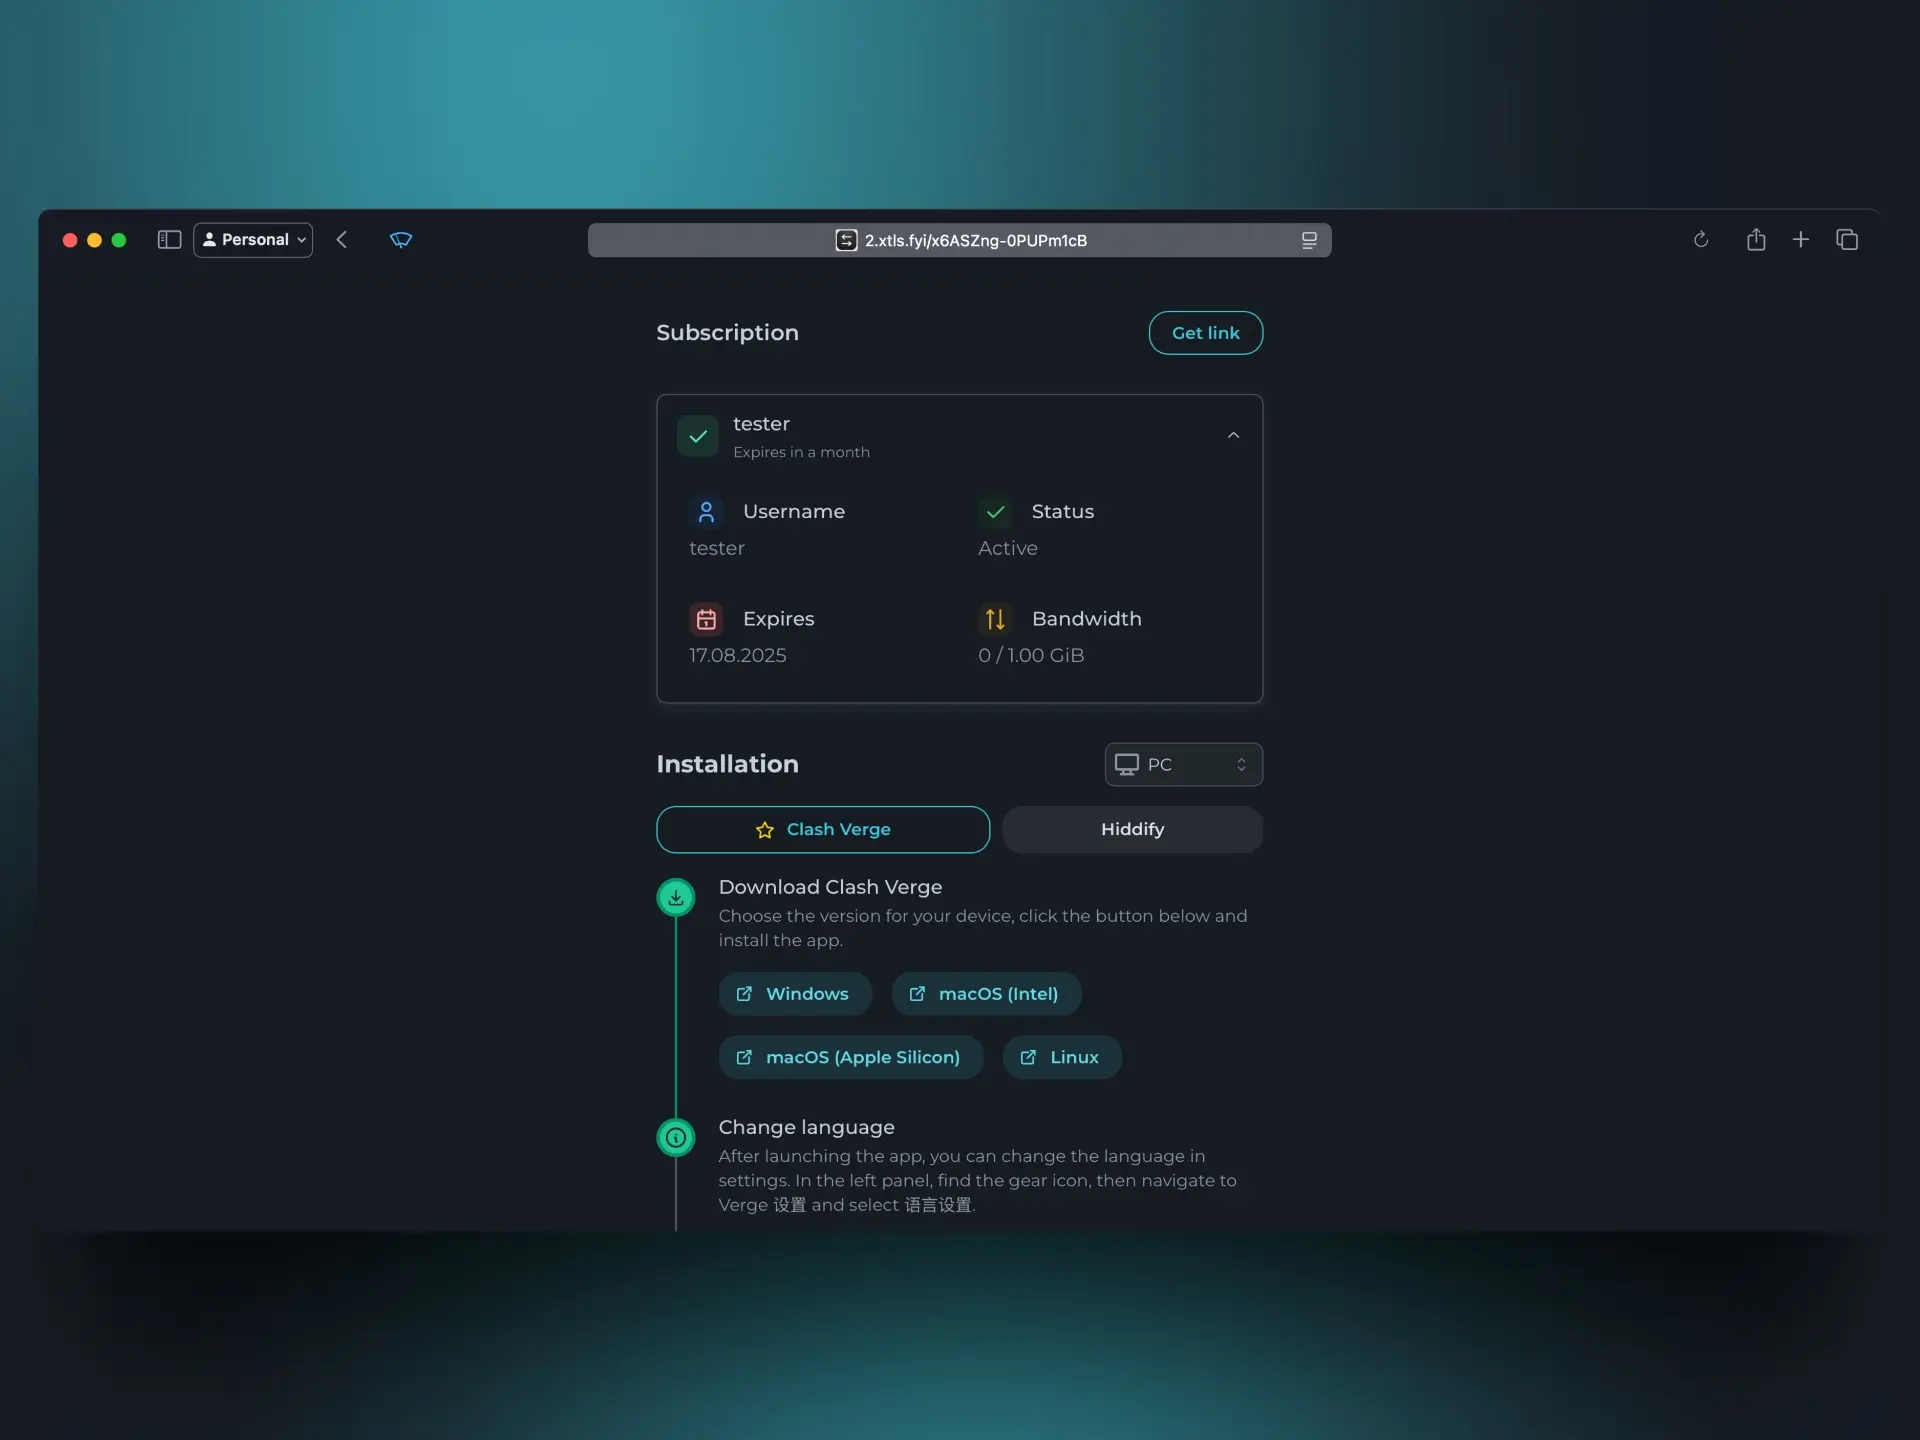
You can customize the Subscription Page, as explained in one of the installation articles.
Verifying the Setup
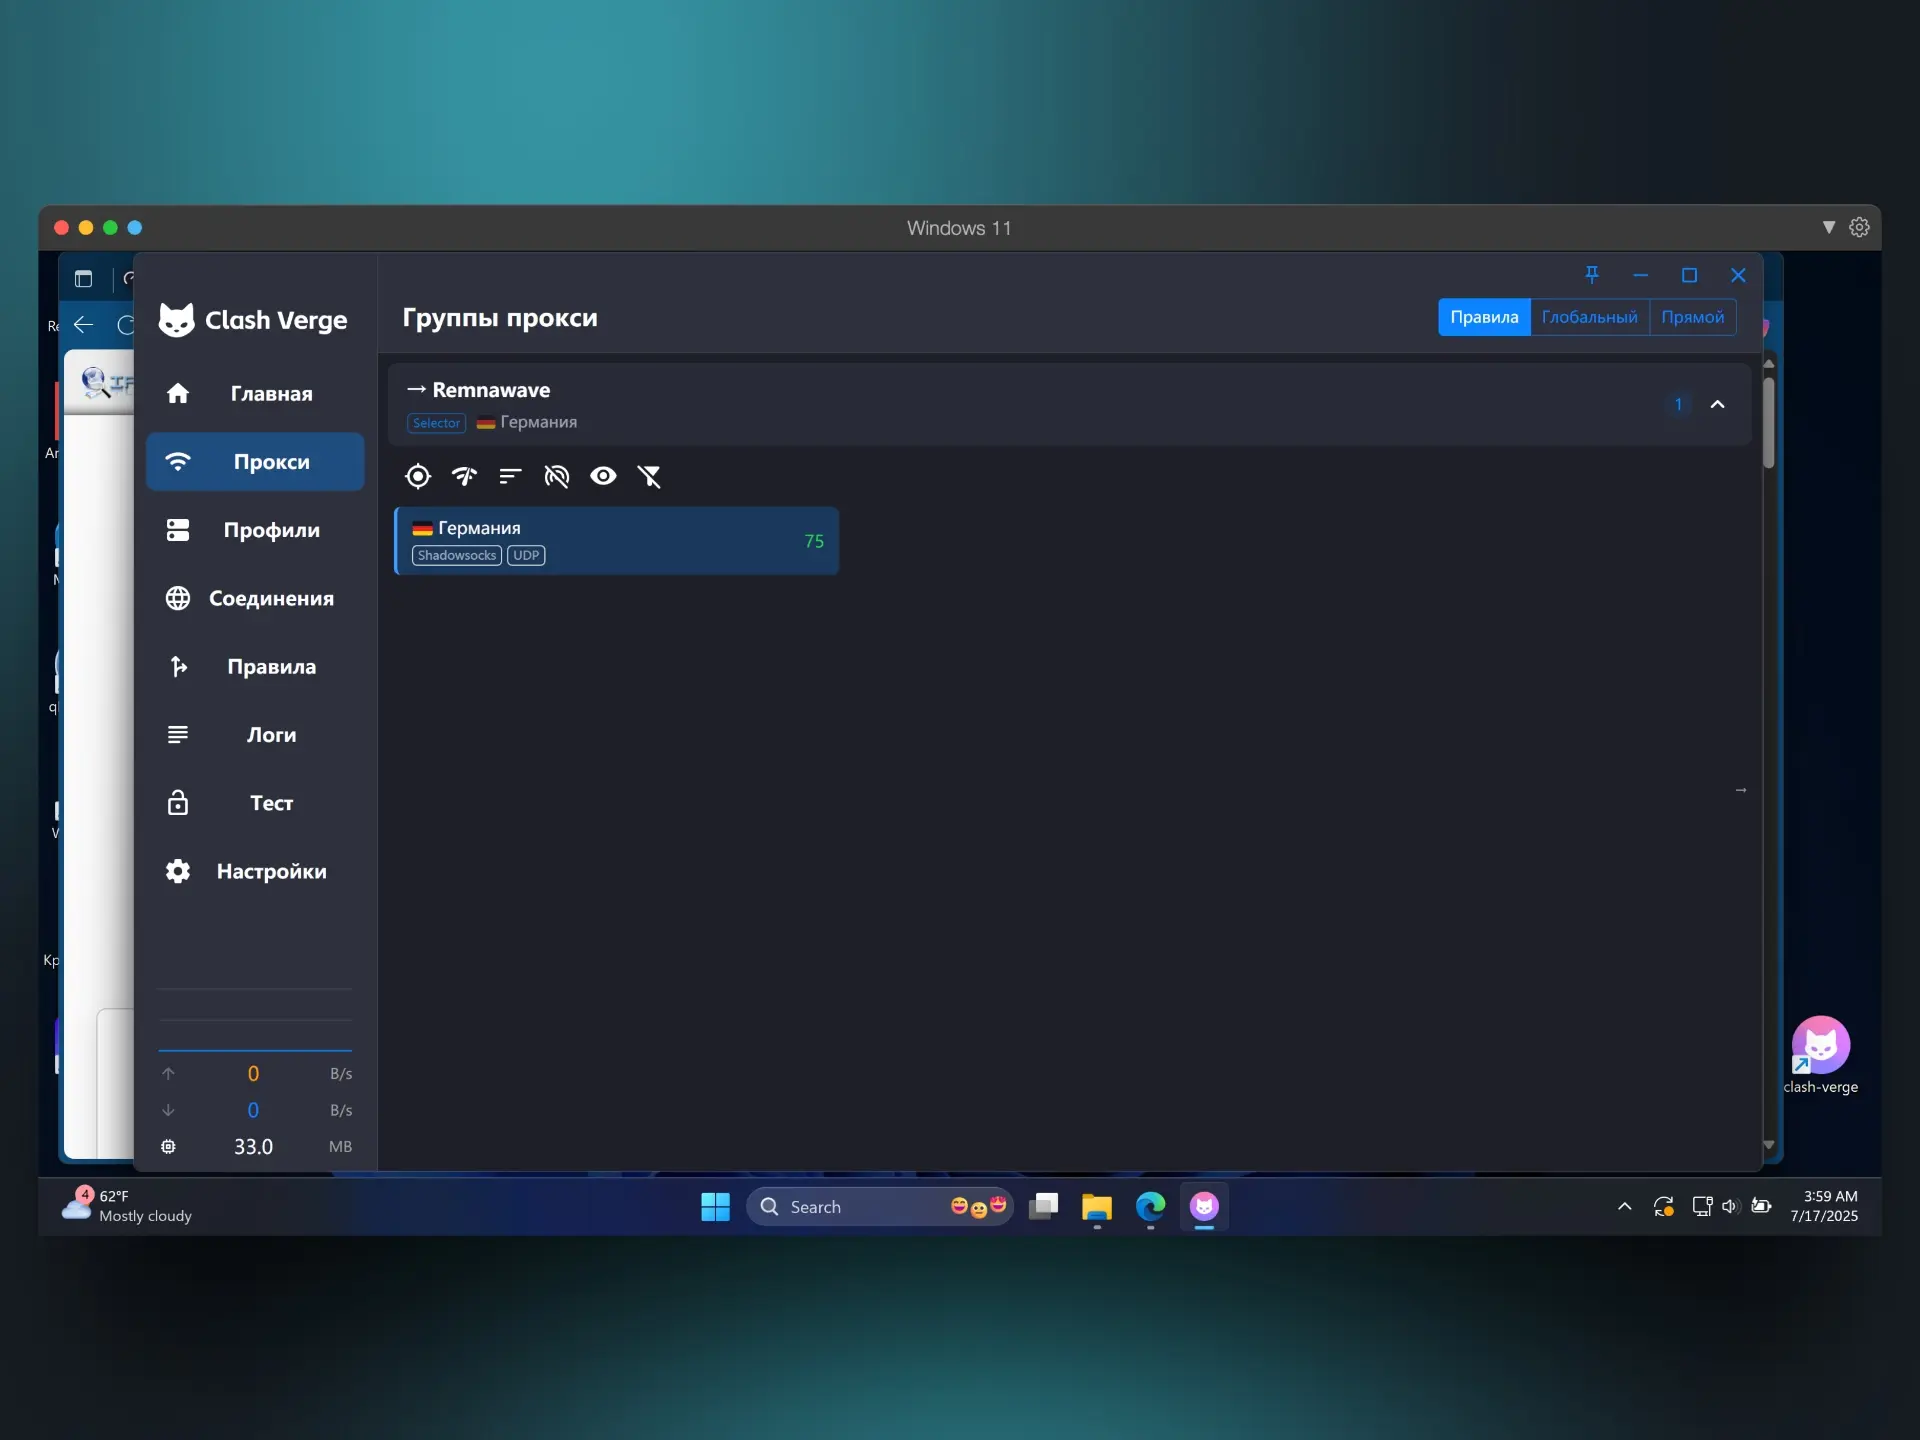
We’ve created a user and obtained their subscription URL. Now, let’s test it by importing the subscription into a client application.
For this example, we'll use Clash Verge Rev.
Once the subscription is imported, connect to the Node and verify that everything is working as expected.
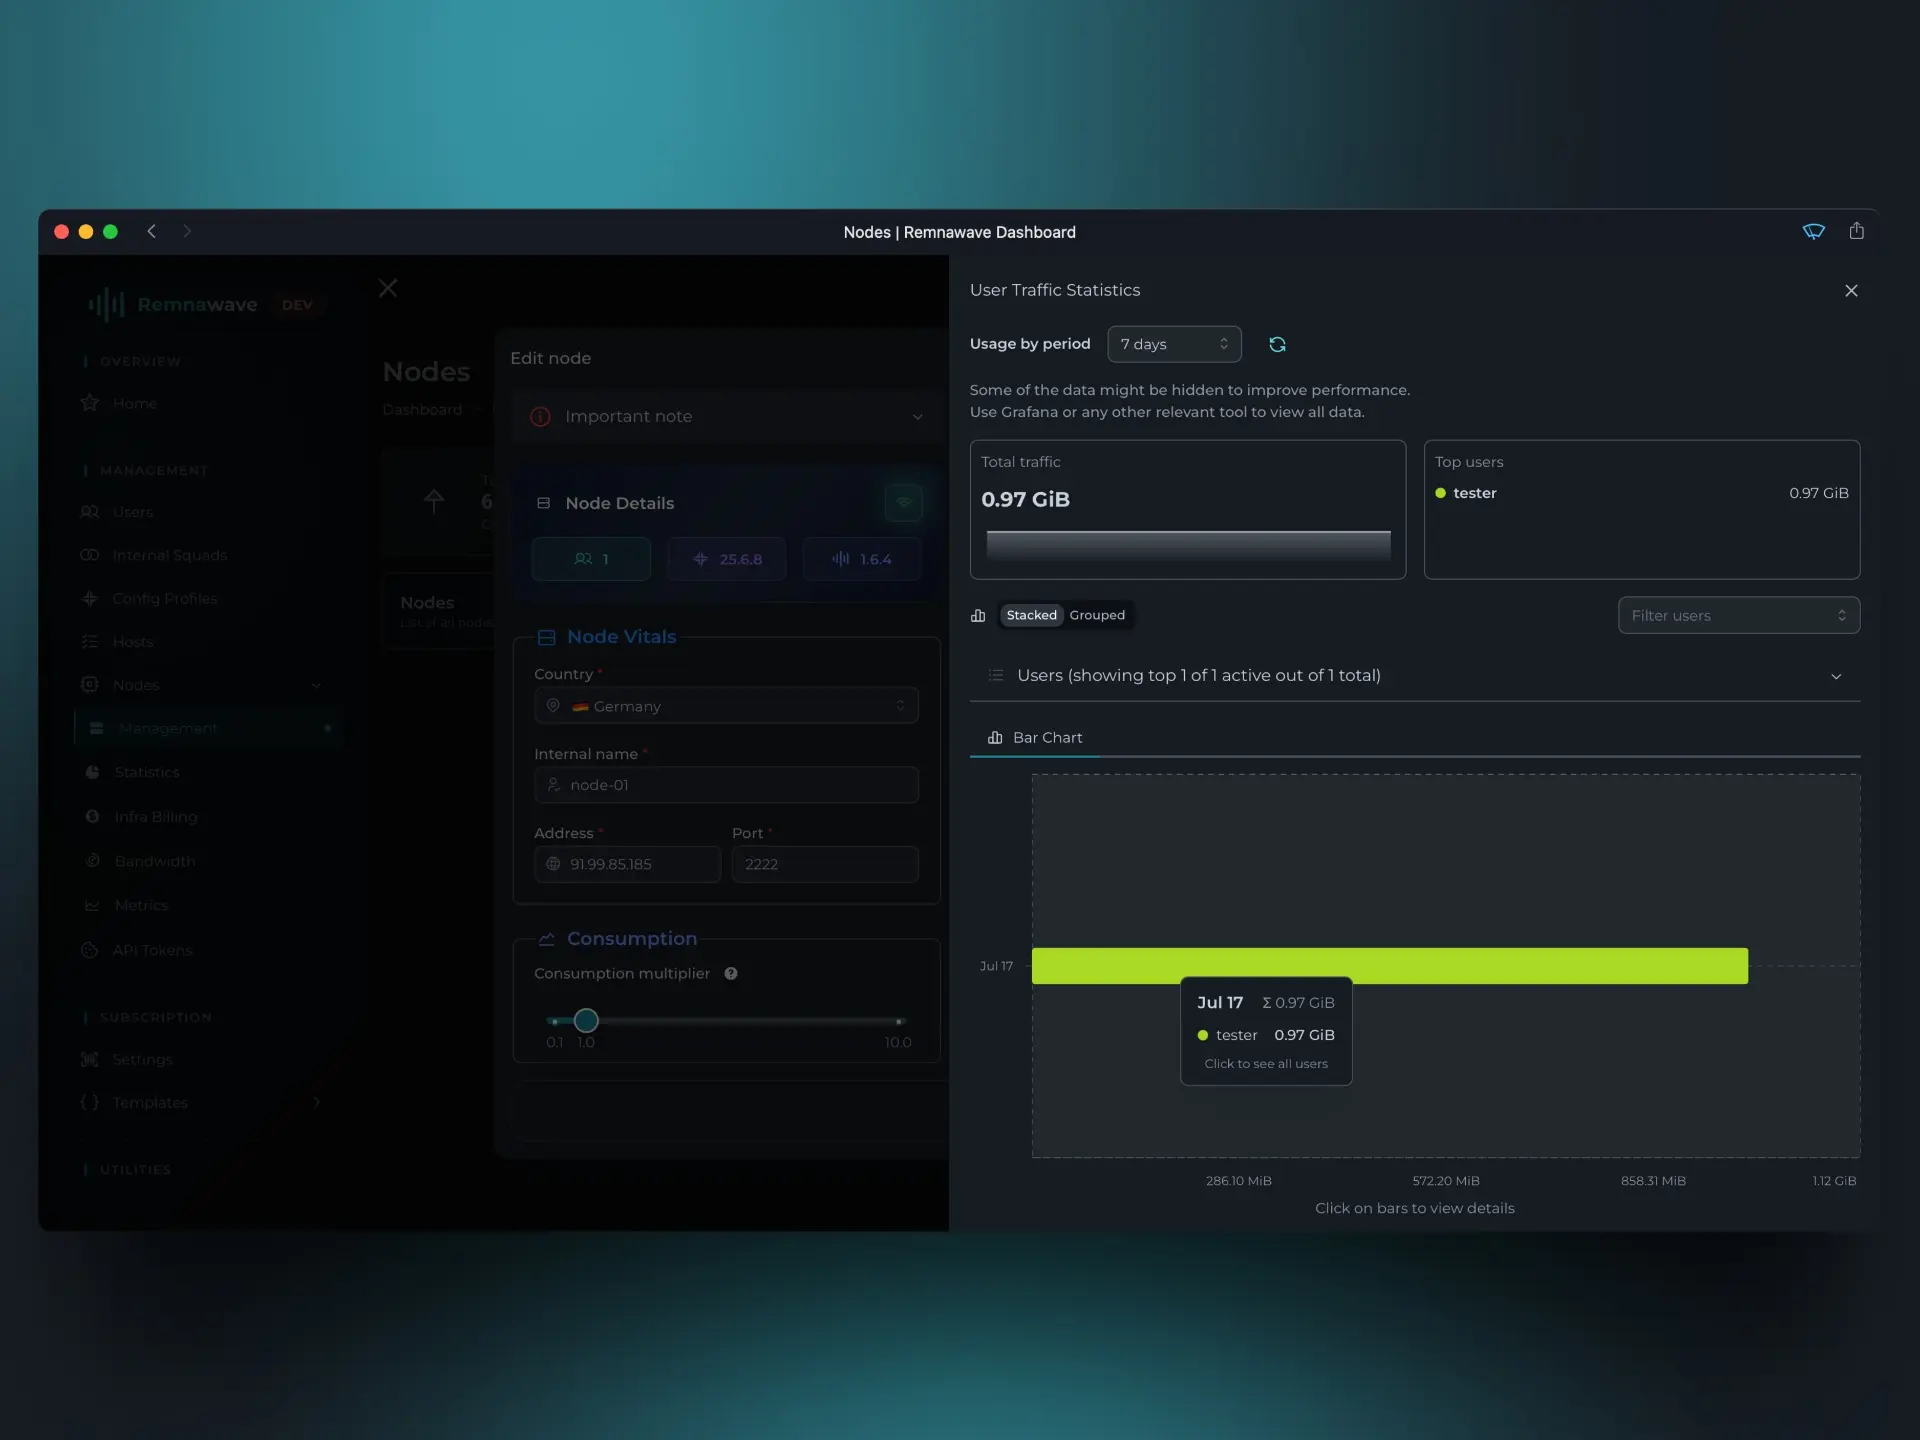
As promised, you can now view updated statistics on the Panel’s Home page and within the Node’s details.

📄️ Config Profiles
Define how Nodes behave by creating Config Profiles.